Shine Bright Indoors: Your Ultimate Guide to Trending Lighting Tricks for Viral Travel Photos
Hey, fellow wanderlusters! It’s your Tripsora blogger, Maya, here, and today we’re diving into a topic that has utterly transformed my travel photography game: lighting tricks for stunning indoor shots.
I still vividly remember my early travel days. Picture this: I’m in a charming little pâtisserie in Montmartre, Paris, the aroma of fresh croissants filling the air. The pastries are laid out beautifully, the coffee is steaming, and the antique decor is just begging to be photographed. I pull out my phone, snap a few pics, and… ugh. They’re dull. Flat. Blurry. The warm, inviting glow I felt in person was completely lost. My Instagram feed looked like a collection of murky memories, while other bloggers seemed to effortlessly capture that ethereal, sun-drenched, or perfectly moody vibe, even indoors.
For years, I believed it was my phone, or maybe I just wasn't "artistic" enough. But after countless hours of trial and error (and a few embarrassing photo fails), I discovered the secret sauce: it’s not about the gear, it’s about understanding and manipulating light. And let me tell you, once you crack the code, every cozy café, historic museum, bustling market, or quirky Airbnb becomes your personal photo studio. These aren't just "tips"; these are the trending techniques that make photos pop, go viral, and truly tell the story of your travels. Ready to transform your indoor snaps from "meh" to "OMG, where is this?!" Let’s get lit!
1. The Undisputed King: Harnessing Natural Window Light for That "Golden Hour Glow" Indoors
Natural light is your absolute best friend, especially when you’re indoors. Forget harsh overhead lights or the yellow glow of a dodgy lamp – the soft, diffused light from a window can create magic. And trust me, it’s not just about direct sunlight; often, indirect light is even better.
The "Softbox" Effect:
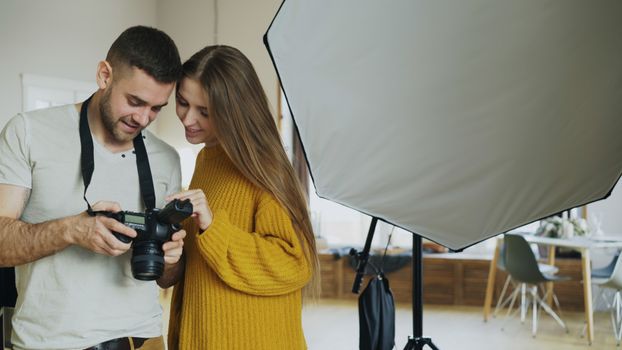
Think of a window as a giant, natural softbox, just like the pros use. Position your subject (that delicious brunch, your travel buddy, or even yourself for a selfie) near a window. The light will be even, flattering, and reduce harsh shadows. My go-to trick for that dreamy, slightly diffused look? Look for a window with sheer curtains. The curtains act as a natural diffuser, softening the light and giving your photos an almost ethereal quality.
Trending Tip: The "Golden Hour" Indoors:
We all chase the outdoor golden hour, but did you know you can recreate it indoors? This is less about the time of day and more about the quality of light. When the sun is lower in the sky (morning or late afternoon), the light filtering through a window takes on a warmer, softer hue. I once stayed in a stunning riad in Marrakech, and the way the late afternoon sun streamed through the intricate window carvings, casting long, dramatic shadows and bathing the room in a warm, amber glow, was pure magic. I positioned my tagine close to the window, letting the light highlight the vibrant spices, and that photo ended up being one of my most shared from the trip!
Actionable Advice:
* Always scout for the best window: Before ordering your coffee, do a quick scan. Which table gets the most beautiful light?
* Face the window: If you’re photographing a person, have them face the window. This illuminates their face evenly.
* Backlight for drama: For a more artistic silhouette or a halo effect around your subject, place them between the window and your camera. This works wonders for capturing the mood of a cozy cafe or a person lost in thought.
* Avoid direct, harsh sun: If the sun is beaming directly through the window, it can create blown-out highlights and harsh shadows. Try to move your subject slightly out of the direct beam or use a sheer curtain to diffuse it.
2. Befriending the Artificial: Mastering Lamps, Fairy Lights, and Even Your Phone's Flashlight
Natural light isn't always an option, especially in dimly lit historical sites, atmospheric restaurants, or late-night markets. This is where artificial light sources become your secret weapon. The trick isn't to blast everything with a harsh flash, but to sculpt with existing light or introduce subtle, flattering light.
The Warmth of Ambient Lighting:
Look for existing lamps, sconces, or even candles. These often emit a warm, inviting glow that can add incredible character to your photos. In a quaint trattoria in Rome, instead of relying on the dim overheads, I angled my phone to capture the soft light spilling from a vintage table lamp onto my pasta dish. The result? A perfectly lit, mouth-watering shot that screamed "authentic Italian experience."
Trending Tip: Fairy Lights & Edison Bulbs:
These aren't just for Christmas anymore! Fairy lights (string lights) are a trending staple for creating dreamy, bokeh-filled backgrounds or adding a magical glow. Many cafes, hotels, and even Airbnbs now incorporate them into their decor. Position your subject so the fairy lights are behind them, slightly out of focus, for that coveted dreamy bokeh effect. Edison bulbs, with their warm, exposed filaments, also create a beautiful, nostalgic glow that's incredibly popular for moody, atmospheric shots.
Your Phone's Flashlight (The Secret Diffuser):
Forget the built-in flash – it’s usually too harsh. Instead, use another phone’s flashlight (or a small, portable LED light) as a directional light source. To soften it, hold a thin piece of tissue paper, a napkin, or even a translucent plastic bag over the flashlight. This creates a DIY diffuser! I’ve used this trick countless times in dimly lit museums to highlight intricate details on artifacts without disturbing others or needing a bulky camera setup. Just be discreet and respectful!
Actionable Advice:
* Utilize existing fixtures: Scan the room for lamps, candles, or decorative lights. Can you use them to illuminate your subject from the side or slightly above?
* Carry a mini LED light: Small, pocket-sized LED panels are inexpensive (around $20-40 on Amazon) and can be incredibly powerful for indoor photography, offering adjustable brightness and color temperature.
* Embrace the bokeh: If you have fairy lights, position them behind your subject and focus on your subject. The out-of-focus lights will turn into beautiful, soft circles (bokeh).
3. The Art of Reflection and Diffusion: Playing with Light and Shadows
Once you understand how light works, you can start to manipulate it using everyday objects. This is where things get really fun and your creativity can shine!
White Walls & Reflective Surfaces:
White walls are natural reflectors. If you have a window on one side and a white wall on the other, the wall will bounce light back onto your subject, filling in shadows and creating a more even illumination. Similarly, mirrors, polished tables, or even puddles of water can be used to reflect light onto your subject or create interesting compositions. I once captured a stunning shot of a historic church interior in Portugal by using a polished marble floor to reflect the intricate ceiling details, adding depth and a unique perspective.
Trending Tip: The "Shadow Play" Aesthetic:
It’s not just about bright light; shadows can be incredibly artistic and contribute to a moody, dramatic, or minimalist aesthetic. Look for patterns created by light streaming through blinds, intricate grilles, or even foliage outside a window. Position your subject within these shadows or highlight the interplay of light and dark. This creates visual interest and tells a more complex story. This trend is huge on Instagram right now for its artistic, editorial feel.
DIY Diffusion and Reflection:
* The Napkin/Scarf Diffuser: As mentioned with the flashlight, a thin white napkin, a sheer scarf, or even a piece of tracing paper can diffuse harsh direct light from a window or an overhead lamp, turning it into soft, flattering light.
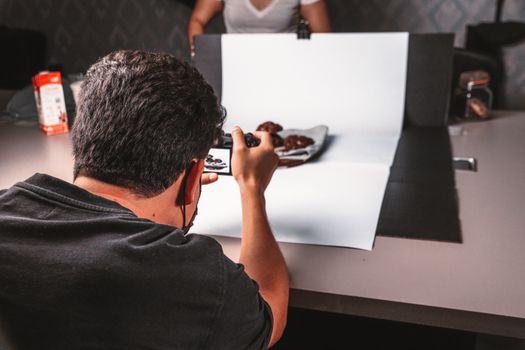
* The Menu/Book Reflector: A white menu, a light-colored book, or even a piece of white cardboard can act as a mini reflector. Hold it opposite your main light source to bounce light back onto your subject, lifting shadows and adding sparkle. I’ve used a crisp white hotel towel more times than I can count to bounce light onto my breakfast spread! It’s all about resourcefulness.
Actionable Advice:
* Look for bounce surfaces: Before you shoot, scan for any light-colored surfaces near your subject that could reflect light.
* Embrace shadows: Don’t be afraid of shadows! Use them to add depth, drama, and artistic flair. Experiment with how they fall on your subject.
* Always carry a white napkin: It’s your emergency diffuser and reflector, ready for action!
4. Composition & Angles: Guiding the Eye with Light
Lighting isn’t just about making things bright; it’s about using light to draw attention, create mood, and enhance your composition. The way you frame your shot and the angle you choose can dramatically impact how light is perceived.
Leading Lines of Light:
Sometimes, light creates natural "leading lines" – paths that draw the viewer's eye through the image. This could be a shaft of light illuminating a corridor, or the way a spotlight highlights a specific architectural detail. In the Grand Bazaar in Istanbul, the light filtering through the high domes created incredible spotlights on specific stalls, instantly drawing my eye and helping me frame my shots.
Trending Tip: Shooting Through Elements for Depth:
One popular technique is to shoot through another element that is lit in a unique way. This could be shooting through a doorway into a brighter room, using a window frame to frame your subject, or even shooting through a sheer curtain. This adds layers, depth, and a sense of discovery to your photos. Imagine a shot of a bustling street through the beautifully lit window of a quiet cafe – the contrast tells a story.
Play with Angles:
* Low Angles for Grandeur: Shooting from a low angle can make a subject appear more imposing and can often capture unique light patterns on ceilings or high architectural details.
* High Angles for Detail & Perspective: A higher angle can be great for food photography, capturing an entire table spread, or showcasing the layout of a room, often allowing you to avoid harsh overhead lighting.
* Side Lighting for Texture: Positioning your light source to the side of your subject (e.g., a window to your left or right) brings out textures and creates interesting shadows, adding depth and dimension to objects like textiles, food, or architectural elements. This is fantastic for capturing the intricate details of a rug in a Moroccan souk or the flaky layers of a pain au chocolat.
Actionable Advice:
* Move around: Don't just stand in one spot. Walk around your subject, observe how the light changes from different angles.
* Look for natural frames: Use doorways, windows, or archways to naturally frame your subject and draw the eye.
* Experiment with foreground elements: Place something slightly out of focus in the foreground that catches the light – a plant, a glass, a decorative object – to add depth and interest.
5. The Final Polish: Post-Processing for That Viral Sparkle
Even with perfect lighting, a little post-processing can elevate your indoor shots from great to absolutely viral-worthy. This isn't about drastically altering your photos, but enhancing the light you've already captured.
Essential Adjustments:
* Exposure: If your photo is a little dark, gently increase the exposure. Be careful not to overdo it and blow out highlights.
* Highlights & Shadows: These are your best friends for indoor shots. Reduce highlights to bring back detail in bright areas (like a window) and lift shadows to reveal details in darker areas without making the whole image flat.
* Contrast: A slight increase in contrast can make your image pop, adding depth and definition.
* White Balance: Indoor lighting can often cast an unwanted color tint (yellow from incandescent bulbs, blue from fluorescent). Adjusting the white balance (warmth/coolness) can neutralize these tints and make colors look more natural and appealing. For that trending warm, cozy vibe, lean slightly towards warmer tones.
Trending Apps & Presets:
You don't need Photoshop! Your phone is a powerful editing studio.
* Lightroom Mobile (Free Version): My absolute go-to. It offers precise control over all the adjustments mentioned above. You can even create and save your own presets for a consistent look.
* Snapseed (Free): Google's fantastic editing app, great for selective adjustments (e.g., brightening just a specific area).
* VSCO: Popular for its aesthetic filters and film-like presets. Many travel bloggers swear by VSCO for creating a cohesive, moody feed.
My Personal Workflow for "Mood-Boosting" Indoor Shots:
1. Adjust Exposure & Contrast: Get the overall brightness and punch right.
2. Tweak Highlights & Shadows: Bring back detail in the brightest and darkest parts.
3. Correct White Balance: Ensure colors look natural, or intentionally warm it up for a cozy feel.
4. Add a touch of Saturation/Vibrance: Make colors pop without looking artificial.
5. Sharpening: A tiny bit of sharpening can make details crisp.
6. Apply a subtle preset (optional): I often use a custom preset I've created in Lightroom that adds a touch of warmth and slightly desaturates greens/blues for a consistent "Tripsora" look.
Actionable Advice:
* Edit with intention: Don't just slap on a filter. Understand what each adjustment does and how it enhances the light you've captured.
* Batch edit for consistency: If you're shooting a series in one location, apply similar edits to maintain a cohesive look.
* Save your favorite edits as presets: This saves time and ensures a consistent style, which is key for a recognizable Instagram feed.
6. Trending Setups for Viral Indoor Shots: From Moody to Minimalist
Now that you've got the technical skills, let's talk about the looks that are currently dominating feeds and getting all the likes and shares. These are often achieved by cleverly combining the lighting tricks we've discussed.
The "Moody Window Silhouette":
This trend is all about drama and introspection. Position yourself (or your subject) against a bright window, letting the natural light outline them while keeping the interior darker. This creates a powerful silhouette. To enhance it, play with reflections on the window itself, or capture a rain-streaked pane for extra mood. I nailed this shot in a rustic cabin in the Scottish Highlands, with the mist-shrouded mountains visible faintly outside the window – pure moody perfection!
The "Soft Focus Cafe Aesthetic":
This is the quintessential travel blogger shot. It involves capturing a beautifully arranged coffee or food spread on a table, often near a window, with a gentle, soft focus. The key here is the diffused natural light (from a window with sheer curtains, perhaps), a slightly open aperture (if your phone allows, or just tap to focus on your main subject), and a clean background. Use a white napkin as a reflector to brighten the front of your subject. The aim is a warm, inviting, and slightly blurred background, making your subject pop.
The "Golden Hour Glow" with Props:
We talked about indoor golden hour, but you can amplify it with props. Think a single, strategically placed string of fairy lights in the background, a warm-toned lamp just out of frame, or even a sunset-projector lamp (yes, these are trending!). The goal is to bathe your subject (or a specific detail) in a warm, soft, golden light, creating an incredibly cozy and aspirational vibe. I saw this brilliantly executed in a boutique hotel in Bali, where a single rattan lamp cast a beautiful, warm pattern on the wall behind the bed – instant viral potential.
The "Minimalist Light & Shadow Play":
This trend focuses on simplicity and artistic composition. It often involves a stark white or neutral background, with a strong, directional light source (like a single window or a focused lamp) casting dramatic shadows. The subject might be a single plant, a piece of art, or even just the patterns created by light and shadow on a wall. It’s about negative space and letting the light be the star.
Actionable Advice:
* Study trending photos: Scroll through Instagram and Pinterest. What kind of lighting do your favorite travel bloggers use in their indoor shots? Analyze their techniques.
* Recreate, don't just copy: Take inspiration from popular trends but adapt them to your unique travel experiences and locations.
* Experiment with props: Don't be afraid to use small, portable props like fairy lights, a colorful scarf, or even a book to enhance your lighting setup.
Your Indoor Photography Revolution Starts Now!
There you have it, globetrotters! The secret isn't fancy gear or a photography degree; it's simply learning to see and manipulate light. From the soft glow of a window in a Parisian cafe to the dramatic shadows in a Moroccan riad, understanding these trending lighting tricks will transform your indoor travel photos from forgettable to absolutely unforgettable.
So, on your next adventure, don’t shy away from those beautiful indoor spaces. Instead, embrace them! Look for the light, play with shadows, get creative with reflections, and remember, your phone is a powerful tool in your hands.
Now go forth, experiment, and illuminate your incredible travels! I can’t wait to see your stunning, viral-worthy indoor shots. Share your favorite lighting tricks or your newly captured masterpieces with us on Instagram using #TripsoraLights and tag @TripsoraOfficial! Let's inspire each other!
---