Shedding Light on the Unseen: Master Indoor Shots Before They Go Mainstream
I remember standing in the dimly lit hall of a historic riad in Marrakech, Morocco, my camera hanging uselessly from my neck. Outside, the sun beat down, illuminating every detail with a photographer's dream light. Inside, however, the intricate mosaic tiles, the plush cushions, the bubbling fountain – all were shrouded in a beautiful, yet frustrating, gloom. Every shot I took looked flat, uninspired, and utterly failed to convey the magic I felt. I sighed, tucked my camera away, and just tried to soak it in with my eyes, feeling like I'd missed a crucial opportunity to share this beauty with the world.
Sound familiar? We've all been there. That stunning boutique hotel lobby, the cozy cafe with the best latte art, the ancient museum filled with priceless artifacts – all begging to be photographed, yet challenging us with their less-than-ideal lighting conditions. For years, I struggled, convinced that professional-grade indoor shots required expensive equipment and a full lighting crew.
But what if I told you that wasn't true? What if I revealed the clever, often unconventional, lighting tricks that travel photographers and bloggers are using right now to create jaw-dropping indoor images, long before they hit the mainstream photography blogs? These aren't about hauling massive strobes or hiring assistants; they're about ingenuity, observation, and a little bit of photographic wizardry.
I’ve spent countless hours experimenting in dimly lit Parisian bistros, shadowy Roman ruins, and cozy Icelandic guesthouses. And I’ve finally cracked the code. These aren't just tips; they're your secret weapon to elevate your indoor travel photography from "meh" to "OMG, how did you get that shot?!" Get ready to bookmark this page, because your Instagram feed is about to get a serious upgrade.
1. The Art of "Borrowed" Light: Your Environment is Your Studio
Forget lugging heavy gear. The most powerful, and often overlooked, light source is already around you. This is about seeing light where others see only ambient glow.
The Cafe Window as a Giant Softbox:
My absolute favorite "borrowed" light source is a large window. Not just for shooting through, but for using the light it brings in. In a charming cafe in Montmartre, Paris, called Le Consulat, I once found myself struggling to capture the intricate details of my croissant and coffee. The interior was cozy but quite dark. Instead of facing the window, I turned my back to it, placing my subject (the food) between me and the window. This created a beautiful, soft front light, illuminating the flaky pastry and the delicate foam art. The window acted as a massive, natural softbox, giving me studio-quality light for free.
- Actionable Tip: Always scout for the largest available window. Place your subject (and yourself, if possible) so the window light hits your subject from the front or slightly to the side. Avoid placing the window behind your subject unless you're intentionally going for a silhouette (more on that later!).
- Beyond Windows: Think outside the box. Is there a brightly lit display case in a shop nearby? A well-lit doorway? Even a large, light-colored wall can bounce ambient light back onto your subject. I once used the light spilling from a brightly lit boutique next door to illuminate a street vendor's stall in Hoi An, Vietnam, creating a beautifully cinematic glow.
2. The Reflective Rebel: DIY Diffusers & Reflectors on the Go
Professional photographers swear by reflectors and diffusers. But who wants to pack those bulky things when you're trying to travel light? The good news is, you don't have to. Your travel bag, and even the local environment, is full of stealthy alternatives.
The Napkin, The Menu, The Smartphone Screen:
My most frequently used "reflector" is often a simple white napkin or a restaurant menu. In a dimly lit trattoria in Rome, I was trying to photograph a delicious plate of cacio e pepe, but one side of the dish was falling into shadow. I simply propped up a white paper menu on the opposite side, angled it towards the restaurant's overhead light, and voila! The menu bounced just enough light back to fill in the shadows, making the pasta look perfectly appetizing.
- Actionable Tip:
- Reflectors: Look for anything white or reflective. A white paper bag, a hotel room mirror, a shiny piece of foil from a snack wrapper (crinkle it gently for a softer reflection), even a friend's white t-shirt! Angle it to bounce existing light onto the shadowy parts of your subject.
- Diffusers: For harsh light (like a direct spotlight or a bright window creating harsh shadows), a thin white fabric (like a scarf or a sheer curtain) can act as a diffuser, softening the light.
- The Smartphone Fill Light: This is a game-changer. Turn on your phone's flashlight function (or even just a white screen at full brightness) and hold it off-camera, angled towards your subject. It provides a surprisingly effective fill light for small details or portraits. I've used this countless times in museum exhibits to highlight a specific artifact without using flash.
3. Shadow Play & Dramatic Silhouettes: Embrace the Dark Side
Sometimes, fighting the darkness is futile. Instead, lean into it. Shadows, when used intentionally, can add incredible depth, mood, and storytelling to your indoor shots. This is where your photos stop being just snapshots and start becoming art.
The Mystery of the Moroccan Riad:
Remember that riad in Marrakech? After my initial frustration, I started playing with the light. I noticed a strong shaft of light coming through an arched doorway at the far end of the courtyard. I asked a fellow traveler to walk through it, positioning them perfectly in the frame. The result? A stunning silhouette, the intricate architecture framing their figure, creating a sense of mystery and grandeur. The shadows surrounding them only enhanced the drama.
- Actionable Tip:
- Backlighting for Drama: Position your subject between you and a strong light source (window, doorway). Expose for the brighter background, letting your subject fall into shadow. This creates a powerful silhouette.
- Partial Shadows for Mood: Don't be afraid of shadows on your subject's face or body. Use them to sculpt features, add intrigue, and create a more artistic, less "flat" image. Think chiaroscuro painting.
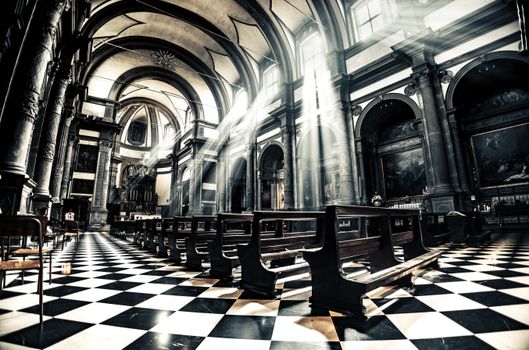
- Leading Lines with Light and Shadow: Use shafts of light or patterns created by shadows to lead the viewer's eye through the frame. In a historic church in Lisbon, I once captured the ornate carvings of a confessional, using the strong diagonal shadows cast by a stained-glass window to draw attention to its ancient details.
4. The Pocket Powerhouse: Mini LEDs & Portable Strobes
While we're aiming for "no heavy gear," there are a few minimalist tools that can radically transform your indoor shots without breaking your back or your budget. These are the unsung heroes of the travel photography world.
My Go-To Gadgets:
* Mini LED Panels: These small, credit-card-sized lights are incredibly versatile. Brands like Lume Cube or various generic Viltrox panels (starting around $20-$50 on Amazon) are dimmable, often color-temperature adjustable, and can fit in any pocket.
* How I use them: I once used a small Lume Cube Mini (around $60-$80) to illuminate a beautifully presented dessert at a Michelin-starred restaurant in Kyoto, Japan, that had incredibly romantic, but very dim, lighting. I held it slightly off-camera, pointed at the dish, and it brought out all the vibrant colors and textures without disturbing other diners.
* Practical Use: Use it as a key light for portraits, a fill light for food, or an accent light to highlight architectural details.
* Smartphone Ring Lights: These clip-on lights (often less than $15) are fantastic for close-up shots, especially selfies or flat lays where you need even, shadow-free illumination. While they might look a bit "mainstream" for selfies, using them subtly for product shots or food photography indoors is still a secret weapon.
- Actionable Tip:
- Experiment with positioning: Hold your mini LED at different angles (above, to the side, slightly behind) to see how it shapes your subject.
- Adjust intensity: Start with the lowest brightness and gradually increase until you get the desired effect. Too much light can look artificial.
- Diffuser hack: If the light feels too harsh, tape a piece of white tissue paper or a thin white plastic bag over the LED for a softer glow.
5. Color Temperature & Mood: White Balance Wizardry
This is where you truly start to paint with light and control the emotional impact of your photos. Color temperature (measured in Kelvin) dictates how warm (orange/yellow) or cool (blue) your image appears. Most cameras and smartphones try to "correct" this automatically, but overriding it can lead to stunning, intentional results.
The Gelato Shop Glow:
In a vibrant gelato shop in Florence, Italy, the overhead fluorescent lights were casting a sickly green-yellow hue on my delicious pistachio and strawberry scoops. My camera's auto white balance was trying its best, but the colors still looked off. I manually adjusted my white balance (on my DSLR, I set a custom white balance by taking a photo of a white card, or on my phone, I used the manual controls in apps like Halide or Lightroom Mobile) to around 4000K, a slightly cooler setting. Suddenly, the pistachio looked genuinely green, and the strawberry a rich red, making the gelato pop with authentic vibrancy.
- Actionable Tip:
- Warm Tones (Higher Kelvin, e.g., 4000K-6000K): Use these to create a cozy, inviting, or romantic atmosphere. Think golden hour indoors, perfect for cafes, old libraries, or intimate portraits.
- Cool Tones (Lower Kelvin, e.g., 2000K-3500K): These evoke a modern, clean, or dramatic feel. Great for architectural shots, sleek hotel interiors, or moody scenes.
- Experiment with Presets: Most cameras and phone apps have white balance presets like "Tungsten" (very cool), "Fluorescent" (cool), "Daylight" (neutral), "Cloudy" (warm), "Shade" (very warm). Play with these to see how they change the mood.
- Shoot RAW (if possible): If your camera or phone supports RAW files, use them! This gives you maximum flexibility to adjust white balance in post-processing without losing image quality.
6. The "Invisible" Tripod: Stability Hacks for Low Light
The biggest enemy of indoor photography, especially in low light, is camera shake. A blurry photo, no matter how good the lighting, is a ruined photo. But who wants to lug a bulky tripod on a backpacking trip? Not me!
My Lisbon Airbnb Night Scene:
I was in a charming Airbnb in Lisbon, Portugal, with a balcony overlooking a bustling square. The interior was beautifully decorated, and I wanted to capture the cozy ambiance with the city lights twinkling outside. It was too dark for a handheld shot, but I didn't have my full-sized tripod. My solution? I stacked a couple of books on a small table, rested my camera (or phone) on top, and used the self-timer to avoid any movement from pressing the shutter. The result was a perfectly sharp, atmospheric shot that captured both the cozy interior and the vibrant exterior.
- Actionable Tip:
- Brace Yourself: Lean against a wall, a doorframe, or a table. Use your elbows to create a stable base.
- Improvise a Tripod: Use anything stable! A stack of books, a chair, a windowsill, a beanbag (you can even fill a small cloth bag with rice or beans from a local market for a DIY beanbag).
- Use a Gorillapod/Mini Tripod: These flexible leg tripods (around $20-$50) are incredibly lightweight and can be wrapped around railings, branches, or simply used as a tabletop tripod. They're a staple in my travel kit.
- Self-Timer or Remote Shutter: Even if you're holding the camera, using a 2-second self-timer or a remote shutter release (often a phone app for modern cameras) eliminates the tiny shake caused by pressing the shutter button.
- Smartphone Night Mode: Modern smartphones have incredible night modes (like Apple's Night Mode or Google's Night Sight) that take multiple exposures and stitch them together to create bright, sharp low-light images. Learn to use yours!
7. Post-Processing Polish: The Final Act of Illumination
Even with all these tricks, indoor photos often need a little extra love in post-processing. This isn't about faking it; it's about enhancing what's already there and bringing your vision to life.
My Rome Cathedral Reveal:
After capturing a stunning interior shot of St. Peter's Basilica in Rome, I found that despite my best efforts, some of the intricate ceiling details were still a bit underexposed. In Lightroom Mobile (a free app with powerful features), I gently boosted the "Shadows" slider, which subtly brightened those darker areas without blowing out the highlights. Then, a slight bump in "Clarity" and "Texture" made the details pop even more. The final image was breathtaking, capturing the true grandeur of the basilica.
- Actionable Tip:
- Apps to Use: Lightroom Mobile (my absolute favorite, free version is powerful), Snapseed (free, intuitive), VSCO (great filters).
- Key Adjustments:
- Exposure: A slight bump can brighten overall.
- Highlights/Shadows: Crucial for balancing dynamic range in indoor scenes. Reduce highlights to recover detail in bright areas; boost shadows to reveal detail in dark areas.
- White Balance: Fine-tune the color temperature and tint to perfect the mood.
- Clarity/Texture: Use sparingly to add definition and "pop" to details, especially in architectural shots or food photos.
- Noise Reduction: Low light often introduces digital noise. Apply noise reduction carefully; too much can make the image look soft.
Your Secret Weapon for Stunning Indoor Shots
The next time you find yourself in a beautifully lit yet challenging indoor space, don't despair. Remember these tricks. Look for the borrowed light, improvise with reflectors, embrace the shadows, utilize your pocket powerhouse, master your white balance, stabilize your shot, and give it that final polish.
These aren't just technical tips; they're about cultivating an eye for light, seeing potential where others see limitations, and transforming ordinary moments into extraordinary memories. You're not just taking a picture; you're crafting an experience.
So go forth, travel, and capture the magic of indoor spaces like never before. Be the trendsetter, the one whose photos make everyone ask, "How did you do that?!" Because soon enough, these "secrets" will be mainstream.
---
What are YOUR go-to indoor lighting hacks? Share your tips and favorite locations where you've used them in the comments below! Don't forget to tag @Tripsora on Instagram when you try these tricks – we'd love to feature your stunning shots! And for more insider travel photography secrets, subscribe to our newsletter!
---