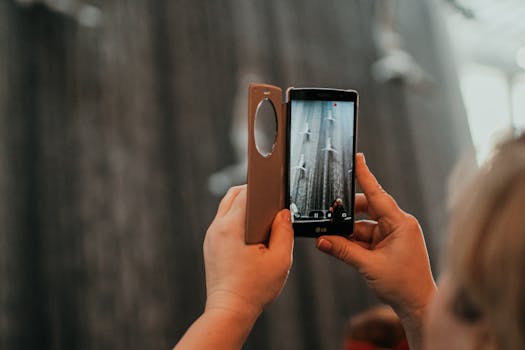
Remember that time you scrolled through Instagram, drooling over a travel blogger's impossibly perfect shot of a bustling market in Marrakech, or a serene canal in Venice, and thought, "How do they do that?" You might imagine them lugging around a professional DSLR with a bag full of lenses, a tripod, and a lighting crew. But what if I told you that many of those envy-inducing images – the ones that truly capture the soul of a place – are often taken with nothing more than a smartphone?
I've been there. My early travel photos were... well, they were fine. Postcards, really. The standard Eiffel Tower shot, the predictable beach sunset. I'd come home, flick through my phone gallery, and feel a pang of disappointment. They didn't convey the feeling of being there. The vibrant chaos, the quiet beauty, the genuine moments.
Then, during a solo trip through Southeast Asia, something shifted. I watched locals – from street vendors to young backpackers – whip out their phones and snap photos that were alive, authentic, and utterly captivating. They weren't just pointing and shooting; they were seeing. They knew the light, the angles, the moments. They had a secret language with their surroundings that I, as a tourist, was missing.
And that's when it hit me: the magic isn't in the gear; it's in the eye, the patience, and a few clever techniques. The "secrets" locals instinctively know, or have simply picked up from living in and loving their cities. These aren't just about taking a pretty picture; they're about capturing the essence of a place, the kind of shot that makes people pause, double-tap, and ask, "Where is that?"
So, put down that bulky camera, clean your phone lens, and get ready. Because I'm about to spill the tea on how to take truly Instagram-worthy photos with just your phone – the kind of shots that locals know are gold, but often keep to themselves.
1. The "Local Eye": Beyond the Postcard Perfection
The biggest difference between a tourist snapshot and a local's gem? Perspective. Tourists often flock to iconic landmarks, trying to recreate photos they've seen a thousand times. Locals, however, know their city's pulse. They see beauty in the mundane, in the overlooked, in the everyday.
Practical Tips for Developing Your Local Eye:
- Wander with Purpose (and No Purpose): Dedicate time to simply walk. Ditch the Google Maps for a bit and let your curiosity guide you down a side street. You'll be amazed at the hidden courtyards, vibrant street art, or quaint cafes you discover. In Rome, I once stumbled upon a tiny, ivy-covered alleyway with a lone Vespa parked perfectly, simply because I took a wrong turn. It became one of my favorite shots.
- Seek Out the Mundane Magic: Don't just look for grand vistas. Focus on details: a street vendor's hands arranging fruit, an old man reading a newspaper in a park, intricate patterns on a doorway, reflections in a puddle. These small moments often tell a richer story. Think of the bustling spice markets in Istanbul – it's not just the overall scene, but the individual sacks of vibrant spices or the merchant's expressive face that truly tells the story.
- Look Up, Look Down, Look Around: Most people shoot at eye level. Break free! Get low to capture interesting foregrounds (like cobblestones or flowers), or look up at architectural details, power lines creating interesting patterns, or even just the sky. In Kyoto, I found myself mesmerized by the intricate roof tiles of a traditional house from a low angle, making it feel grander and more ancient.
- Embrace the "Imperfect": Locals aren't always aiming for pristine. Sometimes, a bit of grit, a weathered wall, or a slightly chaotic scene adds character and authenticity. These are the elements that make a photo feel real and lived-in.
2. Mastering the Light: Your Phone's Best Friend
Light is everything in photography, and your phone, while powerful, is still limited by its small sensor. Understanding and utilizing natural light effectively is the single most impactful "secret" to elevating your phone photos. Locals know this instinctively; they schedule their day around the sun.
Practical Tips for Harnessing Light:
- Embrace the Golden Hour: This is non-negotiable. The hour after sunrise and the hour before sunset bathes everything in a soft, warm, golden glow. It minimizes harsh shadows, adds depth, and makes colors pop. This is when historic buildings look their most majestic, and landscapes become ethereal. I once woke up at 5 AM in Bagan, Myanmar, just to capture the hot air balloons rising over the ancient temples during sunrise. The light was absolute magic, turning the dusty plains into a painter's canvas.
- Don't Forget the Blue Hour: The short period just after sunset or just before sunrise, when the sky turns a deep, rich blue. This is perfect for cityscapes with artificial lights starting to twinkle. The contrast between the cool blue sky and the warm city lights is stunning. Paris at "blue hour" with the streetlights coming on is an entirely different, more romantic city.
- Seek Out Open Shade: When the sun is high and harsh (midday), move into open shade (e.g., under a large tree, in the shadow of a building). This provides soft, even light that's flattering for portraits and prevents blown-out highlights.
- Use Light as a Storyteller: Look for dramatic shadows, silhouettes against a bright sky, or light filtering through a window. These elements add mood and narrative to your photos. A lone figure walking through a sun-drenched alley with long shadows can be incredibly powerful.
- Clean Your Lens! Seriously! This sounds basic, but it's the most common mistake. Your phone lives in your pocket, collecting dust and fingerprints. A smudged lens will result in hazy, dull photos. Give it a quick wipe with a soft cloth before every shot. It's a game-changer, costing nothing but a second of your time.
3. Composition Secrets: Beyond the Rule of Thirds
Everyone knows the Rule of Thirds (or at least has heard of it). It's a great starting point, but locals and seasoned photographers go beyond. They understand how to guide the viewer's eye and create visual harmony. Your phone's grid lines are your best friend here.
Practical Tips for Dynamic Composition:
- Leading Lines: Use natural lines in your environment (roads, paths, fences, rivers, architectural elements) to draw the viewer's eye towards your subject. Imagine a winding path through a forest leading to a distant mountain peak. In Venice, the canals themselves are incredible leading lines.
- Natural Framing: Look for elements that can frame your subject, like doorways, windows, arches, tree branches, or even people's shoulders. This adds depth and context. I often try to frame a bustling street scene through the window of a quiet cafe, creating a sense of intimacy and observation.
- Symmetry & Patterns: Humans are naturally drawn to symmetry. Look for reflections (in water, glass), repeating patterns (tiles, windows, textures), or balanced compositions. The intricate tile work in a mosque in Morocco, or the perfectly aligned houses in a Dutch village, make for stunning, calming shots.
- Negative Space: Don't feel the need to fill the frame. Sometimes, leaving a lot of empty space around your subject can make it stand out more powerfully and evoke a sense of calm or vastness. A lone figure on a vast beach, or a single boat on a wide-open lake, can be incredibly impactful.
- Foreground Interest: Adding something interesting in the foreground (even if slightly out of focus) creates depth and draws the viewer into the scene. A vibrant flower in front of a distant monument, or a patterned tablecloth leading to a delicious meal, adds layers to your photo.
- Break the Rules (Intentionally): Once you know the rules, you can break them. Sometimes, centering a powerful subject, or tilting the horizon slightly, creates a dramatic effect that a perfectly composed shot might miss. Experiment!
4. Editing on the Go: Your Phone is Your Darkroom
This is where the magic truly happens, and it's perhaps the biggest "secret" locals leverage. They don't just take photos; they refine them. Your phone is a powerful editing suite. You don't need expensive software; the best apps are often free or very affordable.
Essential Mobile Editing Apps & Tips:
- Lightroom Mobile (Free with Adobe ID): My go-to. It offers professional-grade adjustments.
- Basic Adjustments: Always start with Exposure, Contrast, Highlights, Shadows, Whites, and Blacks. These are your foundational tools. Boost shadows to reveal detail, pull down highlights to recover blown-out skies.
- Color Correction: Adjust Temperature (warm/cool) and Tint (green/magenta) to get accurate colors. Boost Vibrance or Saturation sparingly.
- Clarity & Dehaze: These can add punch and definition, especially to landscapes.
- Sharpening & Noise Reduction: Use these to make details pop and clean up grainy low-light shots.
- Presets: Explore free presets or create your own to maintain a consistent aesthetic.
- Snapseed (Free): Google's powerful and intuitive editing app.
- Selective Adjustments: This is Snapseed's superpower. You can selectively brighten, darken, or adjust saturation in specific areas of your photo without affecting the whole image. Perfect for bringing out a face or a specific detail.
- Healing Brush: Great for removing small distractions like dust spots, power lines, or unwanted tourists.
- Perspective Tool: Fix skewed architectural shots.
- VSCO (Free with in-app purchases): Known for its beautiful, film-like filters. If you want a specific aesthetic or "vibe," VSCO is excellent.
- The Power of Subtle Edits: Don't over-edit! The goal isn't to make your photo look artificial, but to enhance what's already there. A little contrast, a slight bump in saturation, and straightening a crooked horizon can make a huge difference.
My Personal Workflow Example:
I'll take a photo of a vibrant street food stall in Bangkok. It's a bit underexposed, and the colors aren't quite popping.
1. Lightroom Mobile: First, I'll increase the exposure slightly, bring down the highlights to recover some of the sky, and lift the shadows to show more detail in the food. Then, I'll add a touch of contrast and increase the vibrance to make the food colors sing. Finally, a slight crop to improve composition.
2. Snapseed (Optional): If there's a distracting power line or a tiny smudge, I'll use Snapseed's healing brush. If a specific dish needs a bit more brightness, I'll use selective adjustment.
3. Final Polish: A quick check of white balance and sharpness, and it's ready!
5. Engaging with Your Subject: The Human Element & Candid Moments
Locals don't just photograph places; they photograph people. Capturing authentic human interaction and daily life adds an irreplaceable layer of storytelling to your travel photos. This is where you move beyond "pretty scenery" to "capturing a moment in time."
Practical Tips for People Photography:
- Ask for Permission (Respectfully): If you want a portrait, always ask. A smile, a simple gesture, or a phrase in the local language (even "Photo, please?" or "Can I take your picture?") goes a long way. Be prepared for a "no" and always respect it. Offer to show them the photo afterward. I've had heartwarming interactions with local vendors in Vietnam who, after I bought something, happily posed for a photo with a huge smile.
- Be Discreet for Candid Shots: For street photography, try to be less intrusive. Use burst mode (hold down the shutter button) to capture a series of moments. Don't be afraid to shoot from the hip or pre-focus and wait for the perfect moment.
- Focus on Interactions: Capture people interacting with their environment, with each other, or with their work. A craftsman's hands, a child playing, friends laughing at a cafe – these are gold.
- Tell a Story: Think about what the person is doing. Is it a fisherman mending nets, a barista pouring coffee, or a musician performing? Try to capture the essence of their activity.
- Respect Privacy: Be mindful of cultural norms. In some places, photographing women or children without explicit permission is considered disrespectful. Use your judgment and err on the side of caution.
6. Gear (or Lack Thereof) & Settings: Maximizing Your Phone's Potential
The beauty of phone photography is its simplicity. You already have the best camera with you. But knowing a few tricks about your phone's built-in capabilities can make a huge difference.
Practical Tips for Your Phone's Settings & Features:
- Clean Your Lens (Again!): Seriously, it's that important.
- Enable Grid Lines: Go into your camera settings and turn on the grid. This helps immensely with composition (Rule of Thirds, horizon alignment).
- Tap to Focus & Exposure Lock: Tap on your screen to focus on your subject. Then, tap and hold until a yellow box appears (or similar indicator) to lock both focus and exposure. This prevents your phone from re-adjusting if something moves into the frame. You can also slide your finger up or down to manually adjust brightness.
- Portrait Mode (Bokeh Effect): If your phone has it, use it! It creates a beautiful blurred background (bokeh) that makes your subject pop, mimicking a professional lens. It's fantastic for people, food, or specific details.
- Night Mode: Modern phones have incredible night modes. Learn how to use yours. It often requires you to hold the phone steady for a few seconds, but the results in low light can be stunning – think vibrant night markets, illuminated monuments, or star trails.
- Burst Mode for Action: Hold down the shutter button to take a rapid series of photos. Perfect for capturing fast-moving subjects (kids, pets, street performers) and then picking the best frame later.
- Wide-Angle Lens: Many newer phones have a built-in wide-angle lens. Use it for expansive landscapes, tight interiors, or to get more context in your shots.
- Consider a Mini Tripod/Gorilla Pod (Optional): For stable low-light shots, long exposures, or self-portraits (if you're traveling solo), a small, flexible tripod can be a game-changer. They're cheap and fit in any bag.
- Don't Over-Zoom Digitally: Digital zoom often degrades image quality. If you can, physically move closer to your subject instead of pinching to zoom. If you must zoom, do it minimally.
7. The "Local Secret" Mindset: Beyond the Tourist Trap
This is the ultimate secret. It's not just about how to take photos, but when and where to take them. Locals know the rhythm of their city, and by adopting their mindset, you'll unlock photographic opportunities most tourists miss.
Practical Tips for Adopting a Local Mindset:
- Wake Up Early: This is the golden rule for avoiding crowds and catching the best light (golden hour!). Imagine the Colosseum at sunrise with barely anyone around, or a quiet market coming to life. It's a completely different experience (and photo) than fighting through throngs at midday.
- Stay Out Late: Cities transform at night. The atmosphere changes, the lights come on, and a new kind of beauty emerges. Night photography presents unique challenges but incredibly rewarding results. A bustling night market in Chiang Mai, or the neon glow of Tokyo, offers a completely different visual story.
- Eat Where Locals Eat: Not only will you find better, more authentic food (often cheaper!), but these places are often hubs of local life. The scenes, the interactions, the raw authenticity – they're perfect for candid shots. Forget the tourist trap restaurants; seek out the small, busy eateries tucked away.
- Walk, Walk, Walk: Walking is the best way to discover hidden gems. You'll stumble upon unexpected street art, charming cafes, unique architecture, and local life that you'd never see from a tour bus or taxi. In Lisbon, I discovered a breathtaking viewpoint of the city from a tiny, nondescript alleyway simply by following my feet.
- Engage with Locals (Respectfully): Strike up conversations. Ask for recommendations. Not only will you get incredible tips for food and activities, but you might also learn about local events or spots that are off the tourist radar – prime photo opportunities!
- Be Patient & Observe: Don't rush your shots. Wait for the perfect moment: a person walking into the frame, a bird taking flight, a cloud passing. Sometimes the best photos come from simply observing and waiting.
- Embrace Imperfection: Not every shot needs to be technically perfect. Sometimes, a blurry shot that captures raw emotion, or a slightly off-kilter frame that conveys chaos, is more powerful and authentic than a perfectly composed, sterile image.
Conclusion: Your Phone, Your Vision, Their Secrets
So, there you have it. The "secrets" locals don't want tourists to know aren't about exclusive access or expensive gear. They're about seeing, understanding light, mastering composition, smart editing, engaging with humanity, and most importantly, adopting a mindset of curiosity and respect for the place you're visiting.
Your phone is an incredibly powerful tool. It's always with you, it's discreet, and with these tips, it can become your best travel photography companion. Stop thinking like a tourist, start seeing like a local, and watch your travel photos transform from mere snapshots into compelling stories.
Now go forth, explore, experiment, and capture the authentic beauty of the world. And when you do, we want to see it! Share your amazing phone shots with us on Instagram using #TripsoraSecrets and tag us @TripsoraOfficial. What's your favorite phone photography hack? Drop it in the comments below – let's inspire each other!
---