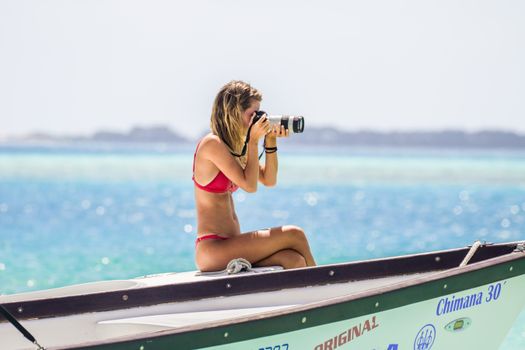
The Secret Sauce to Solo Shots: How to Take Amazing Photos of Yourself Instagram Influencers Don't Want You to Know
There I was, standing on a cliff edge overlooking the turquoise waters of the Amalfi Coast. The sun was dipping, painting the sky in hues of orange and pink, and all I had was my phone and a vague idea of how to take a decent selfie. I tried extending my arm, contorting my body, even attempting a desperate "rock-lean" for a wider shot. The result? A collection of blurry, awkwardly angled photos that barely captured the magic of the moment, let alone me in it. I scrolled through Instagram later that night, bombarded by perfectly composed, effortlessly chic photos of travelers seemingly living their best lives, all taken by what I assumed were invisible photographers. "How do they do it?" I muttered, scrolling past another stunning shot of someone looking wistfully into the distance, perfectly framed by a Tuscan vineyard.
Sound familiar? For years, I believed that truly epic travel photos of myself were reserved for those with a personal photographer in tow, or at least a very patient travel buddy. But after countless solo trips, a mountain of photographic mishaps, and an unwavering determination to capture my adventures authentically, I stumbled upon a revelation. Those "effortless" influencer shots? They're not magic. They're a mix of clever gear, strategic planning, a sprinkle of posing prowess, and a whole lot of editing wizardry. And guess what? You don't need a professional camera or an expensive team to achieve them. You just need to know the tricks.
Forget those awkward selfies and blurry landscapes. This isn't just a guide; it's your secret weapon. I’m pulling back the curtain on the exact techniques, tools, and mindset shifts that will empower you to create magazine-worthy photos of yourself, by yourself. Get ready to bookmark this, because your Instagram feed is about to get a serious upgrade.
1. The Art of the Solo Setup: Your Invisible Photographer
The biggest hurdle for solo travelers wanting great photos is the lack of a photographer. But what if I told you that your best photographer is actually you, equipped with a few smart tools? This is where the magic of the solo setup comes in.
Your Essential Gear Kit:
* The Trusty Tripod (or GorillaPod): This is non-negotiable. A lightweight travel tripod is your best friend. For phones, I swear by the Joby GorillaPod 5K Kit (around $80-100) because its flexible legs can grip almost anything – a tree branch, a railing, even uneven rocks. If you're using a mirrorless or DSLR, invest in something sturdy but still portable, like a Manfrotto Befree Advanced (around $150-200). For just your phone, a smaller, cheaper UBeesize 51-inch Extendable Tripod (around $20-30) will do wonders.
* The Remote Shutter: Forget the frantic 10-second timer dash! A tiny Bluetooth remote (often less than $10) connects to your phone and lets you snap photos from a distance. This gives you freedom to pose naturally without rushing. Alternatively, use your phone's built-in timer (usually 3 or 10 seconds), but the remote is a game-changer for getting multiple shots quickly.
* The Phone (or Camera) You Already Have: Don't feel pressured to buy expensive gear. Modern smartphones like the latest iPhones, Samsung Galaxies, or Google Pixels have incredible cameras capable of stunning shots. Learn to master what you have first.
Setting Up for Success:
1. Find Your Angle: Position your tripod to capture the background you want, then stand in the frame. Experiment with different heights – sometimes a lower angle makes you look more powerful, while a slightly higher one can be more flattering.
2. Use Burst Mode: If your camera has it, use burst mode with your remote. Take 10-20 shots in a rapid sequence. You'll be amazed at how many "in-between" moments turn into perfect, candid-looking shots.
3. Practice, Practice, Practice: Take a few test shots without you in them to nail the composition and exposure. Then, step into the frame and start moving. Don't be afraid to take hundreds of photos. Digital storage is cheap; missed opportunities aren't. My camera roll is often 90% "rejects" for every one perfect shot!
Personal Anecdote: I remember being in a bustling market in Marrakech, desperate to capture the vibrant atmosphere with me in it. I set up my GorillaPod on a spice stall (with permission, of course!), used my remote, and just pretended to browse. The burst mode captured genuine interactions and curious expressions, turning what could have been a chaotic selfie into a dynamic, authentic memory.
2. Mastering Light: Your Best Friend (and Worst Enemy)
Light is the single most important element in photography. It can make or break a photo, regardless of your gear or posing. Influencers understand this implicitly, and you should too.
Harnessing the Golden Hour:
* The Magic Window: This is the sacred time just after sunrise and just before sunset. The light is soft, warm, and creates a magical glow that flatters everyone. Shadows are long and beautiful, adding depth. Plan your shoots around these times. If you want that dreamy, ethereal look, golden hour is your non-negotiable window.
* Sunrise vs. Sunset: Sunrise often means fewer crowds, pristine light, and a cooler, fresher feel. Sunset offers dramatic skies and a warmer, more romantic vibe, but often comes with more people. Choose based on your desired mood and location.
Navigating Tricky Light:
* Overcast Days are Your Friend: Don't dismiss cloudy days! Overcast skies act like a giant softbox, diffusing light evenly and eliminating harsh shadows. This is perfect for portraits and vibrant colors.
* Avoid Harsh Midday Sun: The sun directly overhead creates harsh shadows under your eyes, nose, and chin, often leading to squinting and blown-out highlights. If you must shoot at midday, find open shade (under a large tree, a building's overhang) where the light is more diffused.
* Backlighting for Drama: Shooting directly into the sun can create stunning silhouettes or a beautiful halo effect around your hair. Just be sure to expose for your subject (you!) to avoid turning into a complete shadow unless that's the desired effect. Many phone cameras have an HDR (High Dynamic Range) mode that helps balance exposure in these situations.
Personal Anecdote: I once tried to photograph myself in front of the Eiffel Tower at noon. The result? I looked like a racoon with deep shadows under my eyes, and the tower was overexposed. The next day, I woke up before dawn, braved the cold, and caught the Eiffel Tower bathed in soft morning light. The photos were incomparable – gentle, romantic, and perfectly lit. Lesson learned: The early bird gets the golden hour!
3. Posing Like a Pro (Even When You Feel Awkward)
This is where many people freeze up. Posing can feel incredibly unnatural, especially when you're alone. But influencers aren't just standing there; they're performing a subtle dance with the camera. The secret? It's all about movement and creating "candid" moments.
The Art of the "Candid" Shot:
* Movement is Key: Don't just stand still. Walk towards or away from the camera, twirl, jump, look up, look down. Engage with your surroundings. Pretend you're exploring, laughing, or just enjoying the view. The more natural movement you incorporate, the more authentic your photos will look, especially when using burst mode.
* Look Away: You don't always need to stare directly into the lens. Looking out at the view, gazing thoughtfully into the distance, or even looking at something in your hand can create a more engaging and story-driven shot.
* Interact with Props: A cup of coffee, a book, a local snack, a flowing scarf – these can give your hands something natural to do and add a layer of storytelling. Holding a local map while looking "lost" in a charming European alley? Instant story!
Flattering Poses & Body Language:
* The "Slight Turn": Instead of facing the camera head-on, turn your body slightly (about 45 degrees). This creates a more dynamic pose and can be very flattering.
* Chin Up, Shoulders Back: Good posture instantly makes you look more confident and elegant.
* What to Do with Your Hands: This is a common struggle!
* One hand in a pocket.
* Lightly touching your hair or face.
* Holding a prop (coffee cup, book).
* Resting on your hip.
* Interacting with the environment (touching a wall, holding a railing).
* Legs for Days: If sitting, cross your legs at the ankles or knees. If standing, shift your weight to one leg, or take a step forward. These small adjustments create angles and make your legs appear longer.
* Outfit Choice Matters: Flowy dresses or skirts add movement and drama. Bright colors can pop against a muted background. Choose outfits that are comfortable and make you feel good – that confidence will shine through.
Personal Anecdote: My breakthrough moment came in Bali. I was trying to get a shot walking through a rice paddy. Every time I tried to pose, I looked stiff. Then, I decided to just walk, genuinely enjoying the scenery, letting the rice stalks brush my arms. With my remote in hand, I clicked away. Later, I found a few shots where I was mid-stride, a genuine smile on my face, looking completely at ease. It was a revelation: the best poses are often the ones where you forget you're posing.
4. Editing Magic: The Unsung Hero of Stellar Shots
This is where the real transformation happens. No matter how good your raw photo, a little (or a lot) of editing can elevate it from good to absolutely stunning. Influencers don't just snap and post; they meticulously refine.
Your Go-To Mobile Editing Apps:
* Adobe Lightroom Mobile (Free with Subscription for Premium Features): This is the gold standard. It offers powerful professional tools for exposure, color correction, selective adjustments, and more. The free version is incredibly capable.
* Snapseed (Free): A fantastic, intuitive app by Google. Great for quick fixes, selective adjustments, and its "Tune Image" feature works wonders.
* VSCO (Free with Paid Presets): Known for its beautiful film-like filters (presets). Great for achieving a consistent aesthetic.
* Facetune (Paid): For subtle touch-ups like smoothing skin, whitening teeth, or refining small details. Use sparingly and authentically!
Key Editing Adjustments to Master:
1. Exposure & Contrast: Adjust brightness (exposure) and the difference between lights and darks (contrast) to make your photo pop.
2. Highlights & Shadows: Recover detail in blown-out bright areas (highlights) and lift details from dark areas (shadows).
3. White Balance: Adjust the warmth (yellow/orange) or coolness (blue) of your photo to make colors look natural.
4. Saturation & Vibrance: Enhance colors. Saturation boosts all colors equally; vibrance intelligently boosts muted colors without oversaturating skin tones.
5. Sharpening & Clarity: Add definition to details. Don't overdo it, or your photo will look grainy.
6. Cropping & Straightening: This is crucial! Always ensure your horizon lines are straight. Crop to improve composition, removing distracting elements or bringing focus to yourself. The rule of thirds is a great guide here.
7. Presets/Filters: These are pre-set combinations of adjustments that give your photos a consistent look. Many apps offer them, or you can buy influencer-designed packs. Learn to tweak them to suit your photo and develop your own unique style.
Personal Anecdote: I once took a photo in front of a stunning waterfall in Iceland, but the day was overcast, and the image looked a bit flat. With Lightroom Mobile, I boosted the contrast, pulled down the highlights in the sky, lifted the shadows to reveal more detail in my jacket, and added a touch of warmth to the overall white balance. Suddenly, the waterfall roared, my jacket popped, and the photo felt alive. It went from a "meh" shot to one of my favorites, all thanks to 5 minutes of editing.
5. Location, Location, Location! (Beyond the Obvious)
Anyone can take a photo at a famous landmark. The real skill is finding unique perspectives and less crowded spots that tell a story.
Strategic Location Scouting:
* Research, Research, Research: Before you even arrive, use Pinterest, Instagram geotags, and Google Maps Street View. Look for photos taken from different angles, identify less common viewpoints, or discover hidden gems nearby.
* Early Bird Gets the Empty Shot: This is probably the most repeated, yet most effective, tip. Arriving at popular spots right at sunrise (or even before!) can give you precious minutes or hours to shoot without hordes of tourists. It means sacrificing sleep, but the results are always worth it.
* Explore Beyond the Main Drag: Wander down side streets, look for charming cafes, colorful doors, or interesting architectural details. Sometimes the most beautiful backdrops are just a block away from the main attraction.
* Interactive Environments: Don't just stand in front of a landmark. Interact with it. Sit on a bench overlooking a view, walk along a path, lean against a picturesque wall, or look up at a towering building. This adds depth and narrative to your photos.
Thinking Outside the Box:
* Shoot Through Elements: Frame your shot through a window, an archway, or even foliage. This adds layers and a sense of discovery.
* Reflections: Puddles, lakes, and even wet streets after rain can create stunning reflection shots.
* Look Up, Look Down: Don't just shoot at eye level. Get low for a dramatic perspective looking up, or find a higher vantage point to shoot down, showcasing the scale of a place.
Personal Anecdote: In Venice, I knew St. Mark's Square would be a nightmare for solo photos. Instead, I woke up at 5 AM, before the gondolas even started their day. I found a quiet bridge, set up my tripod, and captured myself walking across it with the iconic canals empty and glowing in the soft morning light. The quiet solitude of those photos tells a much more intimate story than any crowded daytime shot ever could.
6. Mindset and Authenticity: The Real Secret Sauce
All the gear, light, posing, and editing in the world won't matter if you're not approaching it with the right mindset. This is the intangible element that truly sets influencer photos apart.
Embrace the Process (and the Awkwardness):
* Patience is a Virtue: Getting the perfect shot takes time. Be prepared to spend 15-30 minutes (or more!) in one spot, taking dozens of photos, adjusting, and retaking. Don't rush it.
* Don't Be Afraid to Look Silly: Yes, you might get some curious glances setting up a tripod and posing for yourself. Who cares? Most people are too engrossed in their own world to pay much attention. The fleeting awkwardness is a small price to pay for stunning memories.
* Fake It 'Til You Make It Confidence: If you feel awkward, channel your inner actor. Pretend you're totally confident and at ease. Your body language will follow, and that confidence will translate into your photos.
The Power of Authenticity:
* Let Your Personality Shine: Don't try to be someone you're not. If you're naturally goofy, let that come through. If you're more contemplative, capture that mood. Your followers connect with you.
* Tell a Story: Every photo should evoke a feeling or tell a piece of your travel narrative. What were you doing? How did you feel? What was interesting about this place?
* Don't Let the Camera Overshadow the Experience: This is crucial. While getting great photos is fun, remember why you're traveling. Take your photos, then put the camera down and truly immerse yourself in the moment. Experience the place, savor the food, talk to locals. The most authentic photos often come from genuine joy and engagement, not forced poses.
Personal Anecdote: I was once in a small town in Portugal, trying to get a shot of myself enjoying a pastel de nata at an outdoor cafe. I was so focused on the camera that I almost missed a lively conversation between two elderly locals at the next table, gesturing wildly and laughing. I put my camera down, ordered another coffee, and just soaked it all in. Later, I took a quick, genuine shot of my hand holding the pastel against the charming street. It wasn't a "perfect" influencer shot, but it was perfectly me – a delicious memory, authentically captured.
Your Journey to Instagram-Worthy Self-Portraits Starts Now!
There you have it – the exact playbook Instagram influencers use to capture those envy-inducing travel photos of themselves, even when they're flying solo. From the crucial solo setup gear and mastering the magic of light to finessing your poses and unleashing the power of editing, you now possess the knowledge to transform your travel photography.
Remember, it's not about being a professional model or having expensive equipment. It's about being strategic, patient, and embracing the creative process. Your travels are unique, and your photos should reflect that incredible journey.
So, next time you're planning an adventure, pack your tripod, charge your remote, and get ready to create some scroll-stopping magic. Don't just see the world – capture yourself experiencing it, beautifully and authentically.
Now it's your turn!
Grab your phone (or camera!), practice these tips on your next local adventure, and share your stunning solo shots with us! Tag @Tripsora and use #TripsoraSoloShots – we can't wait to see your amazing creations!
---