Capture Your Legend: Epic Self-Photos You Need to Experience Before You Die
Let's be honest. We've all been there. Standing in front of an architectural marvel, a sweeping natural landscape, or a vibrant street scene, camera (or phone) in hand, brimming with excitement. You want to capture that moment, with you in it, telling your story. But then reality hits: the awkward angle, the blurred background, the "can you take a photo of me?" plea to a well-meaning but often un-photographic stranger, or worse, the dreaded selfie stick that screams "tourist!"
I remember my first solo trip to Rome. I was utterly captivated by the Colosseum at sunset, the ancient stones glowing amber. I tried every angle with my phone, contorting myself into a human pretzel, only to end up with a series of unflattering close-ups or a distant, blurry figure lost against the grandeur. It was frustrating. I wanted to be part of that epic scene, not just a visitor documenting it. It was then, amidst the ruins of ancient Rome, that I vowed to master the art of the solo travel self-portrait. Not just a selfie, but a self-portrait – a deliberate, artistic capture of me in the context of the world's wonders. And let me tell you, it changed everything.
This isn't just about vanity; it's about documenting your journey, celebrating your courage to explore, and creating visual memories that truly reflect the magic of your adventures. These are the photos you'll look back on and feel a surge of pride, the ones that inspire others, and the ones that make you say, "Yes, I was there." So, ditch the awkwardness, embrace your inner artist, and let's dive into how you can take amazing photos of yourself that you absolutely need to experience before you die.
---
1. The Vision Board: Dreaming Up Your Epic Self-Portrait
Before you even pack your bags, the magic begins with intention. This isn't about snapping a quick pic; it's about creating a visual narrative.
Research and Inspiration are Your Best Friends:
Scour Pinterest, Instagram, and other travel blogs (like Tripsora, of course!) for inspiration. Look at how others have captured themselves in iconic locations. What angles do they use? What time of day? What outfits? Do they interact with the environment?
- Personal Anecdote: Before my trip to Iceland, I spent weeks poring over images of the Black Sand Beach (Reynisfjara). I noticed a recurring theme: people standing small against the massive basalt columns, or silhouetted against the powerful waves. I knew I wanted a shot that conveyed both the raw power of nature and my humble presence within it. This early research helped me visualize the shot long before I even landed.
Define Your Story:
What do you want your photo to say? Are you an adventurer conquering a peak? A contemplative soul lost in a bustling city? A joyful explorer discovering hidden gems? Your intention will guide your composition, pose, and even your outfit choice. A flowing dress might be perfect for a dramatic cliffside shot, while hiking gear tells a tale of rugged exploration.
Scout Your Locations (Virtually & In-Person):
Use Google Street View, satellite maps, and travel forums to identify prime photo spots. Look for interesting backdrops, leading lines, and natural frames. Once you arrive, do a quick scout during the day (even if you plan to shoot at sunrise/sunset) to understand the terrain, potential hazards, and best angles.
- Tripsora Tip: When planning a shot, consider the "Rule of Threes" – what are the three most compelling elements in your frame? It could be you, a landmark, and a natural element like water or sky.
---
2. Your Solo Photo Arsenal: Gear That Elevates Your Game
While your smartphone is incredibly capable, a few key pieces of gear can transform your self-portraits from good to absolutely legendary.
The Indispensable Tripod:
This is your silent, steadfast photographer. Don't skimp here. A sturdy, portable tripod is non-negotiable for sharp, well-composed shots.
* Smartphone Tripods: For phone users, a compact, flexible tripod like the Joby GorillaPod is fantastic. It can grip onto railings, rocks, or stand on uneven surfaces. Price: ~$30-60.
* Travel Tripods: For mirrorless or DSLR cameras, invest in a lightweight carbon fiber travel tripod. Brands like Peak Design Travel Tripod (Price: ~$350-600) or Manfrotto Befree Advanced (Price: ~$150-250) are excellent choices – sturdy enough for stability but light enough to carry on hikes.
* Monopod with Mini-Tripod Base: A versatile option for quick setups.
Remote Shutter Release:
This is the magic wand that lets you step into the frame without sprinting back and forth.
* Bluetooth Remote: For smartphones, a tiny Bluetooth remote costs less than $10 and fits in any pocket. I use mine constantly!
* Camera Remote: For dedicated cameras, check if your camera has a built-in Wi-Fi app (most modern ones do) that allows remote control from your phone. Otherwise, a wired or wireless remote shutter release is a small investment (typically $15-50).
Lenses (If Using a Camera):
* Wide-Angle Lens: Essential for capturing expansive landscapes and making yourself a small, yet significant, part of a grand scene. A 16-35mm or 14-24mm lens on a full-frame camera (or equivalent on crop sensors) is ideal.
* Prime Lenses: A 35mm or 50mm prime lens offers beautiful depth of field for more intimate self-portraits, especially in urban settings.
Drones (For the Ultimate Perspective):
If your budget and travel restrictions allow, a compact drone like the DJI Mini series (Price: ~$300-800) can capture truly unparalleled self-portraits from above. Imagine yourself standing on a cliff edge, with the drone soaring above, capturing the vastness around you. Always check local drone laws and restrictions before flying!
- Personal Anecdote: I once used my drone to get an incredible shot of me kayaking on a crystal-clear lake in Slovenia. The drone's perspective highlighted the vibrant turquoise water and the surrounding Julian Alps in a way no ground-level camera ever could. It took a few attempts to get the framing right, but the result was pure magic.
---
3. The Art of Light & Composition: Crafting Visual Masterpieces
This is where you move beyond just "taking a picture" and start "creating art." Understanding light and composition will transform your photos.
Embrace the Golden Hour (and Blue Hour!):
* Golden Hour: The hour after sunrise and the hour before sunset. The light is soft, warm, and magical, casting long, beautiful shadows and bathing everything in a golden glow. It’s incredibly flattering for skin tones and adds a dreamy quality to landscapes.
* Tripsora Tip: Plan your shoots around these times. Use apps like "PhotoPills" or "The Photographer's Ephemeris" to pinpoint exact sunrise/sunset times and light angles for any location.
* Blue Hour: The period just before sunrise or just after sunset, when the sky deepens into rich blues and purples, and artificial lights begin to twinkle. Perfect for atmospheric cityscapes or dramatic natural scenes.
Master Composition Rules (and Know When to Break Them):
* Rule of Thirds: Imagine dividing your frame into nine equal sections with two horizontal and two vertical lines. Place your main subject (you!) along these lines or at their intersections for a more dynamic and balanced shot.
* Leading Lines: Use natural or man-made lines (roads, paths, rivers, fences) to draw the viewer's eye towards you or a focal point.
* Framing: Look for natural frames like archways, tree branches, windows, or doorways to "frame" yourself within the scene. This adds depth and interest.
* Symmetry & Patterns: In locations with strong architectural elements or natural patterns, use symmetry to create powerful, balanced compositions.
* Negative Space: Don't be afraid of empty space! It can make your subject stand out and create a sense of scale or tranquility. Imagine yourself small against a vast desert or ocean.
- Personal Anecdote: In Paris, I wanted a classic Eiffel Tower shot. Instead of standing directly in front of it, I found an archway in the Trocadéro gardens. I set my tripod, used my remote, and framed myself peeking out from under the arch, with the tower perfectly centered in the background. The framing made the shot instantly more artistic and less like a typical tourist photo.
---
4. Beyond the Pose: Infusing Emotion & Story into Every Frame
The difference between a snapshot and a self-portrait is often the story it tells and the emotion it conveys.
Interact with Your Environment:
Don't just stand there! Lean against a wall, sit on a bench, walk down a path, look out into the distance, reach out to touch something, or even dance! Your interaction makes the photo dynamic and authentic.
* Example: Instead of just standing in front of a waterfall, capture yourself looking up at it in awe, or reaching out to feel the mist.
Capture Movement & Candid Moments:
Use your remote shutter to take a burst of photos as you walk, spin, or jump. You'll be amazed at the natural, unposed moments you capture. Set your camera to a 2-second timer and then a continuous shooting mode.
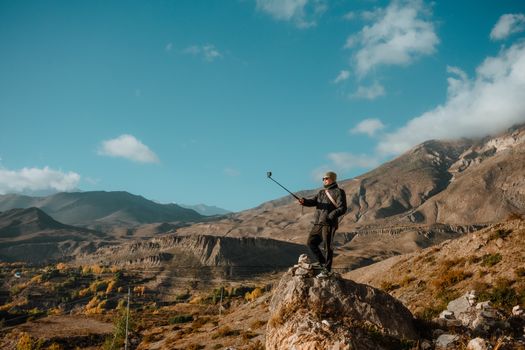
* Personal Anecdote: While hiking in Patagonia, I set my camera on a rock overlooking a stunning valley. I then 'walked' into the frame, pretending to be mid-stride, looking out at the vista. I took about 20 shots in a row. One of them perfectly captured my silhouette against the dramatic peaks, backpack on, looking like a true adventurer. It felt candid even though it was planned.
Convey Emotion:
Are you feeling wonder, joy, solitude, contemplation, or excitement? Let it show! A genuine smile, a thoughtful gaze, or an expression of pure bliss will elevate your photo.
* Tripsora Tip: Think about the mood of the location. A bustling market calls for an energetic, curious pose, while a serene temple might call for a calm, respectful one.
Outfits & Props (Subtly):
Your outfit can enhance the story. A vibrant dress can pop against a muted landscape, or earthy tones can blend you into nature. Consider a subtle prop like a hat, a book, or a cup of coffee if it adds to the narrative without distracting.
* Example: A straw hat and flowing linen dress on a beach in Bali instantly evoke a relaxed, tropical vibe.
---
5. Bucket List Backgrounds: Iconic Spots for Unforgettable Self-Shots
Some places just beg for an epic self-portrait. Here are a few dream locations and ideas for how to capture yourself within their grandeur:
- Machu Picchu, Peru:
- The Shot: You, small but mighty, overlooking the ancient Inca citadel as the morning mist burns off.
- Logistics: Go for sunrise! You'll need an early start, likely staying in Aguas Calientes the night before. Pre-book your entrance tickets and bus up the mountain. Set up your tripod at the classic "Guardhouse" viewpoint or higher up at Sun Gate (Inti Punku) for a truly epic vista. The light is incredible as the sun hits the ruins.
- Price: Entrance tickets ~$45-50 USD, bus ~$24 USD round trip.
- Tip: Be patient. It gets crowded. Find a moment of relative calm, set your timer for 10 seconds, and capture a series.
- Santorini, Greece:
- The Shot: You, framed by the iconic white-washed buildings and blue domes, overlooking the caldera at sunset.
- Logistics: Head to Oia. Find a spot away from the main crowds (which can be intense). Many hotels have private terraces, but you can find public viewpoints. The golden hour light makes the white buildings glow and the Aegean Sea sparkle.
- Price: Free, but consider staying in Oia for easier access.
- Tip: Wear something that pops against the white and blue, like a bright red or yellow dress.
- Trolltunga, Norway:
- The Shot: You, sitting or standing dramatically on the "Troll's Tongue" rock formation, with the fjord stretching out beneath you.
- Logistics: This is an intense 10-12 hour, 28km round-trip hike. You must be prepared with proper gear and fitness. There's often a queue for the iconic photo spot. Use that time to set up your gear perfectly.
- Price: Free hike, but transportation/accommodation costs apply.
- Tip: Go early or late in the season (June, September) to avoid peak crowds. Have your tripod and remote ready so you can grab your shot quickly when it's your turn.
- Angkor Wat, Cambodia:
- The Shot: Your silhouette against the iconic temple spires reflected in the lotus ponds at sunrise.
- Logistics: Arrange a tuk-tuk driver the night before to pick you up around 4:30 AM. Head straight to the left reflecting pond. Set your tripod low to capture the reflection and your silhouette.
- Price: Angkor Pass ~$37 USD for one day. Tuk-tuk for sunrise ~$15-20 USD.
- Tip: Be patient and embrace the crowds. The magic of the sunrise makes it all worthwhile.
- Japanese Cherry Blossoms (Sakura), Japan:
- The Shot: You, walking or sitting beneath a canopy of delicate pink cherry blossoms, perhaps holding a traditional fan or simply looking up in wonder.
- Logistics: Timing is everything! Cherry blossom season (late March to early April, varies by region) is short and unpredictable. Research peak bloom forecasts. Popular spots include Ueno Park in Tokyo or Philosopher's Path in Kyoto.
- Price: Free to view.
- Tip: Wear light, complementary colors. Use a wide aperture on your camera (or Portrait Mode on your phone) to blur the background into a dreamy wash of pink.
---
6. Shoot Smart, Shoot Safe: Responsible Photography on the Go
Getting the shot is important, but your safety, the safety of others, and respect for the environment and local culture are paramount.
Personal Safety First:
* Be Aware of Your Surroundings: When you're focused on your camera, it's easy to become oblivious. Be mindful of traffic, uneven terrain, and people around you.
* Secure Your Gear: Keep your camera bag closed and close to you, especially in crowded areas. A strap that crosses your body is ideal.
* Don't Take Unnecessary Risks: That "epic" shot isn't worth a fall, an injury, or worse. If a ledge looks unstable, or a path too dangerous, don't do it. There's always another angle.
* Inform Someone: If you're heading to a remote location for a shoot, let a friend or family member know your plans and expected return time.
Respect Local Culture & Environment:
* Ask Permission: When photographing people, especially in more traditional communities, always ask for permission first. A simple "May I take your photo?" (in their language if possible) goes a long way.
* Dress Appropriately: When visiting religious sites, ensure you're dressed respectfully (shoulders and knees covered).
* Leave No Trace: Pack out everything you pack in. Don't disturb wildlife or natural formations. Stay on marked paths. Don't trample flowers or sensitive ecosystems for a photo.
* Be Mindful of Others: Don't hog a popular photo spot for too long. Be considerate of other tourists and locals. If you're using a drone, be aware of noise and privacy concerns. Many places prohibit drones entirely.
- Personal Anecdote: I once saw a tourist trying to climb over a roped-off section of a temple in Thailand, purely for a photo. Not only was it disrespectful, but they were also risking damage to ancient structures. It's a stark reminder that our pursuit of the perfect shot should never come at the expense of cultural or environmental integrity. Always prioritize respect and safety.
---
7. The Final Polish: Editing & Sharing Your Masterpiece
You've captured the raw material; now it's time to bring your vision to life and share it with the world.
Mobile Editing Apps are Powerful:
You don't need a fancy desktop software to make your photos pop.
* Adobe Lightroom Mobile (Free & Paid): My go-to. Offers incredible control over exposure, color, contrast, and selective adjustments. You can apply presets (pre-saved editing styles) for a consistent look across your photos.
* Snapseed (Free): Google's powerful editing app, great for quick fixes, selective adjustments, and creative filters.
* VSCO (Free & Paid): Known for its film-like filters and subtle color grading.
Key Editing Steps:
1. Crop & Straighten: Ensure your horizon is level and crop to improve composition.
2. Exposure & Contrast: Adjust brightness and dynamic range.
3. Color Correction: Tweak white balance, saturation, and vibrance to make colors pop naturally.
4. Sharpening & Noise Reduction: Enhance detail and reduce graininess.
5. Selective Adjustments: Use brushes or radial filters to brighten your face, darken a distracting background, or enhance a specific element.
- Tripsora Tip: Develop a consistent editing style or use a preset pack (there are many free and paid options online) to give your Instagram feed a cohesive, professional look.
Tell Your Story When Sharing:
A great photo deserves a great caption.
* The "Behind the Shot" Story: Share the effort, the early morning wake-up, the hike, or a funny anecdote about how you got the photo. People love authenticity!
* Location Details: Tag the exact location.
* Ask a Question: Engage your audience by asking them about their dream photo spots or favorite travel memories.
* Use Relevant Hashtags: Maximize discoverability with hashtags like #solotravel #travelphotography #selfportrait #wanderlust #bucketlist and specific location tags (e.g., #MachuPicchu #Santorini).
* Tag Tripsora! We love seeing your incredible adventures and might even feature you!
- Personal Anecdote: I once posted a photo from the Cliffs of Moher in Ireland, but instead of just a pretty picture, I shared the story of battling fierce winds and nearly losing my tripod (and myself!) to get the shot. It resonated much more than just the image alone, sparking a conversation about the challenges and triumphs of travel photography.
---
Go Forth and Create Your Legend!
Taking amazing self-photos isn't just about technical skill; it's about courage, creativity, and a willingness to embrace the journey. It's about seeing yourself as an integral part of the incredible world you're exploring. These photos are more than just likes on social media; they're tangible proof of your adventures, your growth, and the unforgettable moments you've lived.
So, pack your bags, grab your tripod, and get ready to create visual masterpieces that tell your story. Don't wait for someone else to capture your legend – go out and shoot it yourself!
What's the most epic self-portrait you dream of taking? Share your dream location and shot idea in the comments below! Let's inspire each other!
---