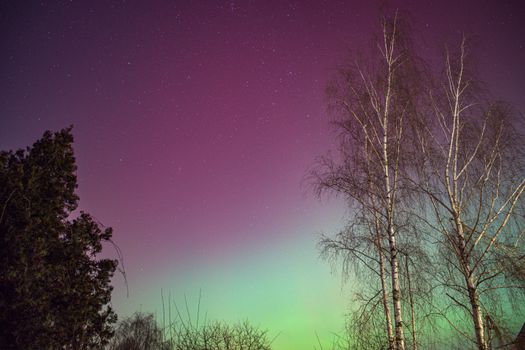
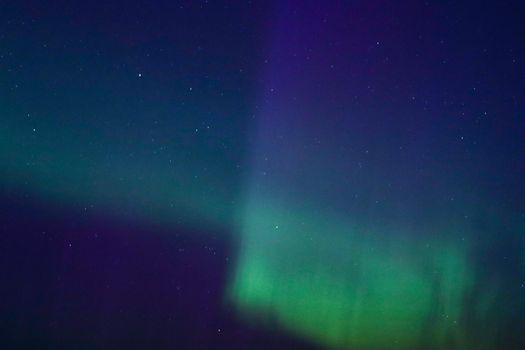
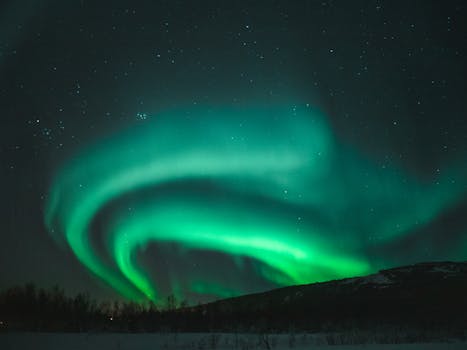
The biting wind whipped around me, stinging my cheeks. My fingers, despite thick gloves, felt like icicles. It was -20°C in the heart of Finnish Lapland, and I’d been standing in a snowdrift for what felt like an eternity, staring up at a sky that was stubbornly, beautifully, black. Then, a whisper. A faint, ethereal glow on the horizon, like a celestial watercolor wash. It grew, intensifying, stretching across the inky canvas above. Green, then streaks of pink, violet, and even a fleeting blue, dancing, swirling, pulsing with an otherworldly rhythm. My jaw literally dropped. This wasn't just a light show; it was a living, breathing spectacle of cosmic ballet.
I fumbled for my camera, desperate to capture it. But in my awe-struck haze, I’d forgotten everything I thought I knew about photography. The settings were wrong, my hands were shaking, and the cold was relentless. The few blurry, underexposed shots I managed didn't even begin to do justice to the vibrant spectacle unfolding above me. That night, I promised myself: next time, I wouldn't just witness the Aurora Borealis; I would master its capture.
Fast forward a few years, countless frozen fingers, and hundreds of successful (and a few hilariously failed) attempts later, I'm here to share the blueprint. The Northern Lights are trending right now – appearing on every travel blogger's bucket list and filling Instagram feeds with dazzling displays. But getting that perfect, shareable shot isn't just about being in the right place at the right time; it's about being prepared, knowing your gear, and understanding the magic you're trying to freeze. This isn't just a guide; it's your personal roadmap to bringing home those jaw-dropping, viral-worthy Aurora photos. Let's dive in!
The Cosmic Dance: Understanding the Aurora (and Why Preparation is Key)
Before we talk cameras, let's talk about the star of the show: the Aurora Borealis. This incredible phenomenon is caused by charged particles from the sun colliding with gases in Earth's atmosphere. The result? A breathtaking light show that usually appears green (oxygen at lower altitudes), but can also burst into pinks, purples, and reds (nitrogen and higher-altitude oxygen).
When and Where to See Them:
* Season: Generally late August to April, when the nights are long and dark. Winter (December-February) offers the longest nights and often the clearest skies, but also the coldest temperatures.
* Location: You need to be within the "Aurora Oval," a band around the magnetic poles. Top spots include:
* Iceland: Easily accessible, stunning landscapes.
* Norway (Tromsø, Lofoten Islands): Dramatic fjords and coastal beauty.
* Finland (Lapland): Arctic wilderness, glass igloos.
* Sweden (Abisko): Known for its "Blue Hole" microclimate offering clear skies.
* Alaska (Fairbanks): High chances, rugged beauty.
* Canada (Yukon, Northwest Territories): Remote, pristine wilderness.
* Forecasts: This is crucial! Monitor space weather forecasts like the Kp index (a scale from 0-9 indicating geomagnetic activity) on sites like NOAA's Space Weather Prediction Center or apps like "My Aurora Forecast." A Kp of 3 or higher is generally good for visible lights, but even a Kp 1-2 can produce a stunning display under dark skies.
* Darkness: Get away from city lights! Light pollution is your enemy. Head to national parks, remote cabins, or join an organized Aurora hunt tour that takes you deep into the wilderness.
Understanding these basics ensures you maximize your chances of seeing the Aurora. Because let's be honest, you can't photograph what isn't there!
Your Essential Gear Checklist: More Than Just a Camera
Capturing the Northern Lights is a specialized form of night photography, and it demands the right tools. Think of your gear as your arsenal against the darkness and the cold.
- Camera Body: The Brains of the Operation
- DSLR or Mirrorless: Both work, but mirrorless cameras often perform better in low light and are lighter.
- Full-Frame Sensor: This is highly recommended if your budget allows. Larger sensors gather more light and produce less noise at high ISOs, which is critical for Aurora photography. Crop sensor cameras can work, but you'll be pushing their limits.
- Manual Mode Control: Your camera must have full manual control (M mode) for aperture, shutter speed, and ISO.
- Lenses: Your Window to the Cosmos
- Wide-Angle is King: You want to capture as much of the sky and foreground as possible. Lenses like 14mm, 16mm, 20mm, or 24mm are ideal for full-frame cameras. For crop sensors, look for equivalents (e.g., 10-20mm).
- Fast Aperture (Low f-number): This is paramount! Aim for f/2.8 or wider (f/1.8, f/1.4). A wider aperture lets in more light, allowing for shorter shutter speeds and lower ISOs, resulting in sharper, less noisy images. My go-to is often a 14mm f/2.8 or a 20mm f/1.8.
- Tripod: The Unshakable Foundation
- Sturdy and Stable: Absolutely non-negotiable. You'll be using long exposures (several seconds), and any camera movement will result in blurry images. Invest in a good quality tripod that can withstand wind and cold. Carbon fiber is lighter, aluminum is cheaper.
- Ball Head: Easy to adjust your composition.
- Remote Shutter Release (or Intervalometer): Hands-Free Magic
- Pressing the shutter button directly can introduce camera shake, especially during long exposures. A wired or wireless remote shutter release or an intervalometer allows you to trigger the shot without touching the camera. Many cameras also have a built-in 2-second timer, which can work in a pinch.
- Extra Batteries: The Cold's Arch Nemesis
- Cold temperatures drain batteries incredibly fast. Carry at least 2-3 spare batteries, kept warm in an inside pocket close to your body. Trust me, running out of juice just as the Aurora peaks is soul-crushing.
- Headlamp with Red Light Mode: Illuminate, Don't Blind
- You'll need light to see your camera settings, but white light will ruin your night vision and disturb others. A headlamp with a red light setting is essential.
- Warm Clothing & Accessories: Stay Comfortable, Stay Shooting
- Layer, layer, layer! Thermal base layers, fleece mid-layers, and a waterproof/windproof outer shell.
- Warm hat, neck gaiter, and thick, insulated gloves (preferably with touch-screen compatibility or finger flaps so you can operate your camera).
- Hand warmers and foot warmers are lifesavers.
- A thermos with hot tea or coffee: Pure bliss on a frigid night.
My Personal Pro-Tip:
I always pack a small, foldable stool or a foam pad to sit on. Standing for hours in the snow can be exhausting, and a bit of comfort goes a long way in maintaining patience!
Mastering the Manual: Camera Settings for Aurora Brilliance
This is where the magic happens – and where many first-timers get frustrated. Don't worry, it's simpler than it sounds once you understand the principles.
- Shoot in RAW: Always, always, always shoot in RAW format. This captures the maximum amount of image data, giving you far more flexibility in post-processing to recover details, adjust colors, and reduce noise without destroying image quality.
- Manual Mode (M): Take Control!
- Forget auto or priority modes. You need full control.
- Aperture (f-stop): Wide Open!
- Set your lens to its widest aperture (lowest f-number). This means f/2.8, f/1.8, f/1.4 – whatever your lens allows. The goal is to gather as much light as possible.
- ISO: The Light Amplifier
- This is your camera's sensitivity to light. Start with ISO 1600 or 3200.
- If the Aurora is bright and fast-moving, you might go lower (ISO 800-1600).
- If it's faint or slow, you might need to go higher (ISO 3200-6400).
- Higher ISOs introduce more digital noise, so it's a balance. Full-frame cameras handle high ISOs much better than crop sensors. Experiment and find your camera's sweet spot.
- Shutter Speed: The Time Machine
- This determines how long your camera's sensor is exposed to light.
- The Rule of 500 (or 300 for crop sensor): Divide 500 by your lens's focal length to get the maximum shutter speed before stars start to trail (e.g., 500 / 14mm = ~35 seconds). This is a guideline.
- Aurora Movement:
- Faint/Slow Aurora: Start with 15-25 seconds.
- Bright/Fast Aurora: Shorter shutter speeds (5-10 seconds) are better to capture the detail and "curtain" effect without blurring the movement too much.
- Experimentation is Key: Take a shot, review it (zoom in to check for star trails), and adjust.
- Focus: Manual and Infinite
- Crucial Step: Autofocus will fail in the dark. Switch your lens to manual focus (MF).
- Focus to Infinity: For most wide-angle lenses, you'll need to focus to infinity. Some lenses have an infinity symbol (∞). If not, in daylight, focus on a distant object (e.g., a mountain) and note where the focus ring is. Or, in the dark, use a distant bright star or the moon (if visible) to manually focus, then lock it there.
- Live View Zoom: Use your camera's Live View mode and zoom in on a bright star to nail your focus. It's a game-changer!
- Don't Touch it Again: Once focused, leave it! Tape your focus ring if you're worried about accidental bumps.
- White Balance: Setting the Mood
- Auto White Balance (AWB): Often struggles in dark, monochromatic scenes.
- Manual Setting: Try "Daylight" (5000-5500K) or "Tungsten" (3200K) or "Fluorescent" (4000K) to start.
- Custom White Balance (K): If your camera allows, set it manually. Somewhere between 3500K-4500K usually gives a good starting point for that classic green look.
- RAW Advantage: Since you're shooting RAW, you can easily adjust white balance later in post-processing without losing quality. Don't stress too much here, but a good starting point helps.
My Personal Pro-Tip:
After setting up, take a test shot. Review the image on your camera's LCD. Zoom in 100% to check for sharpness (especially the stars) and noise. Don't be afraid to adjust ISO and shutter speed based on the Aurora's intensity. If it's faint, crank up the ISO and extend the shutter. If it's blazing, shorten the shutter to capture its dynamic movement.
Fieldcraft & Patience: Tips for the Chase
Photographing the Aurora is an adventure in itself. It’s not just about technical settings; it’s about the experience and strategy.
- Location Scouting (Daytime): If possible, scout your locations during the day. Look for interesting foreground elements – a lone tree, a frozen lake, a rustic cabin, mountains, or even a small tent – to add depth and narrative to your shots. A good foreground transforms a simple sky shot into a captivating landscape.
- Composition is Key: Don't just point and shoot. Think about the rule of thirds. Frame your shot with compelling foregrounds, leading lines, or reflections in water/ice. A human element (a silhouette of yourself or a friend looking up at the lights) can add a sense of scale and wonder.
- Stay Warm, Stay Patient: This cannot be stressed enough. You might be out there for hours. If you're cold and miserable, you'll rush your shots and miss opportunities. Layer up, bring snacks, and that thermos of hot chocolate!
- Light Pollution is the Enemy: Even a distant town's glow can wash out the fainter parts of the Aurora. Use light pollution maps (e.g., Dark Sky Finder) to find truly dark spots.
- Protect Your Gear: Condensation is a real threat when bringing cold gear into a warm space. Before heading indoors, seal your camera and lenses in a plastic bag (like a Ziploc) with as much air removed as possible. Let it warm up slowly to room temperature inside the bag. This prevents moisture from forming inside the camera body and lens elements.
- Patience and Persistence: The Aurora is fickle. It might appear for a few minutes, vanish, and reappear hours later. Or it might be a faint glow for most of the night before erupting into a dazzling display. Be patient, keep checking the forecasts, and enjoy the silence of the Arctic night. Sometimes, the best shots come after hours of waiting.
My Personal Anecdote:
One night in Iceland, after a promising Kp forecast, the sky remained stubbornly cloudy for hours. Our guide was ready to call it a night, but I insisted we wait just a little longer. We huddled in the bus, sipping coffee, feeling the disappointment settle in. Then, a tiny break in the clouds, and a faint green arc appeared. Within minutes, the clouds parted further, and the sky exploded into a vibrant, swirling vortex of green and purple. Those last 30 minutes of waiting yielded some of my most cherished and popular Aurora photos, all because of a little stubborn patience.
Beyond the Shot: Post-Processing Your Aurora Magic
Congratulations, you've captured the Aurora! But the journey isn't quite over. Post-processing is where you truly bring out the magic in your RAW files. Programs like Adobe Lightroom, Photoshop, or even free alternatives like GIMP or Darktable are your friends.
- Import & Culling: Import your RAW files. Go through them and select your best shots. Delete the obvious duds.
- Basic Adjustments:
- Exposure: Adjust overall brightness.
- Contrast: Enhance the difference between light and dark areas.
- Highlights & Shadows: Recover details in bright and dark parts of the image.
- Whites & Blacks: Set your true white and black points.
- White Balance: Fine-tune your white balance. You can make the greens pop more, or bring out the subtle purples and blues. Experiment until it looks natural and vibrant.
- Noise Reduction: High ISOs mean noise. Use the noise reduction tools in your software. Be careful not to overdo it, as it can soften details. Apply it selectively if possible.
- Sharpness & Clarity: Add a touch of sharpness and clarity to make details pop, especially in the foreground.
- Color Adjustments: Use the HSL (Hue, Saturation, Luminance) sliders to enhance specific colors, like making the greens more vivid or boosting the purples.
- Lens Corrections: Apply lens profile corrections to fix any distortion or vignetting from your wide-angle lens.
- Cropping & Straightening: Crop for better composition and straighten any crooked horizons.
My Personal Workflow:
I usually start in Lightroom, applying basic global adjustments. Then, I might move to Photoshop for more intricate local adjustments, like subtly brightening the foreground or enhancing a specific part of the Aurora with a mask. The goal is to enhance, not create. You want the photo to reflect the awe you felt, not an artificial rendition.
My Top Aurora Hunting Grounds (and a Budget Bite)
Ready to book your trip? Here are some of my favorite places to chase the lights, along with a rough idea of what to expect financially. These are general estimates and can vary wildly based on your travel style, accommodation, and activities.
- Iceland:
- Why: Jaw-dropping landscapes (waterfalls, black sand beaches, glaciers) that make for incredible foregrounds. Relatively easy to self-drive.
- Best Time: September-March.
- Typical Costs: Mid-range to expensive.
- Flights: $500-$1000+ (from North America/Europe).
- Accommodation: $100-$300+ per night (guesthouses to hotels).
- Car Rental: $50-$150+ per day (essential for flexibility).
- Aurora Tours: $70-$150 for a bus tour, $200-$400+ for smaller group/jeep tours.
- Pro Tip: Rent a 4x4, download an offline map, and chase the clear skies yourself. Check the cloud cover forecast religiously!
- Tromsø, Norway (Norwegian Lapland):
- Why: Known as the "Gateway to the Arctic," Tromsø is a vibrant city surrounded by stunning fjords and mountains. High chances of seeing the lights.
- Best Time: September-April.
- Typical Costs: Expensive. Norway is generally one of the pricier destinations.
- Flights: $600-$1200+ (from North America/Europe).
- Accommodation: $120-$350+ per night.
- Aurora Tours: $100-$200 for bus tours, $250-$500+ for dog sledding/snowmobile Aurora chases.
- Pro Tip: Combine your Aurora hunt with other Arctic activities like whale watching, dog sledding, or reindeer sleigh rides for a truly unforgettable trip.
- Finnish Lapland (Rovaniemi, Levi, Saariselkä):
- Why: Magical winter wonderland vibe, often with deep snow and charming wooden cabins. Santa Claus Village is a bonus!
- Best Time: Late August-April.
- Typical Costs: Mid-range to expensive.
- Flights: $600-$1100+ (from North America/Europe to Helsinki, then domestic to Rovaniemi/Kittilä).
- Accommodation: $80-$300+ per night (from basic hotels to glass igloos). Glass igloos can be $400-$800+ per night.
- Aurora Tours: $80-$180 for bus/snowmobile tours.
- Pro Tip: Consider staying in a remote glass igloo or a traditional log cabin for a unique experience and direct access to dark skies.
- Fairbanks, Alaska, USA:
- Why: Located directly under the Aurora Oval, Fairbanks boasts some of the highest chances of seeing the lights in North America. Rugged, wild, and incredibly beautiful.
- Best Time: Mid-August to mid-April.
- Typical Costs: Mid-range to expensive.
- Flights: $400-$800+ (from major US cities).
- Accommodation: $80-$250+ per night.
- Aurora Tours: $70-$150 for bus tours, $200-$400+ for specific viewing lodges or dog sled tours.
- Pro Tip: Visit Chena Hot Springs for a unique experience: soak in natural hot springs while waiting for the Aurora to appear overhead!
Budget Bite:
Traveling to these regions can be costly. To save money:
* Travel during shoulder seasons: Early autumn (September) or late spring (April) can be slightly cheaper, though conditions might be less predictable.
* Cook your own meals: Eating out is expensive. Stay in accommodations with kitchenettes.
* Opt for guesthouses/hostels: Save on lodging.
* Self-drive (where feasible): Renting a car can be cheaper than multiple tours, especially if you're traveling with a group.
* Look for flight deals: Be flexible with your dates.
The Unforgettable Moment: My Personal Aurora Story
It was my second trip to Iceland, and after a few nights of clouds, the forecast finally looked promising. We drove for hours, chasing clear patches of sky, ending up on a remote, windswept black sand beach near Vik. The waves crashed rhythmically, a powerful, primal sound in the darkness. The air was thick with expectation, and a small group of us stood shivering, cameras poised.
For a long time, nothing. Just the vast, star-studded sky and the roaring ocean. Then, a faint green smudge appeared over the horizon, barely visible to the naked eye. I adjusted my settings, taking test shots, tweaking the focus, battling the wind that threatened to topple my tripod. It was a slow build. The smudge grew into an arc, then a ribbon, slowly gaining intensity.
Suddenly, a gasp from the group. The Aurora exploded. Not just green, but streaks of electric pink shot through the sky, twisting and turning like cosmic smoke. It pulsed, it danced, it flowed, mirroring the waves crashing on the shore. I fired shot after shot, my heart pounding, tears welling in my eyes despite the freezing cold. I remembered my first attempt, the frustration, the blurry photos. But this time, I was ready.
I captured wide-angle shots of the Aurora reflecting in the wet sand, framed by the basalt columns of Reynisfjara. I zoomed in for close-ups of its intricate curtains. I even managed a selfie with the Aurora blazing behind me, a tiny silhouette against the grandest light show on Earth. The moment lasted for perhaps 20 minutes of pure, unadulterated magic before fading back to a gentle glow. When it finally dimmed, a profound silence fell over our small group, broken only by the waves. We had witnessed something truly extraordinary, and I had the memory card full of breathtaking images to prove it.
That night, I didn't just take photos; I felt them. And that, my friends, is the true essence of Northern Lights photography.
Your Aurora Adventure Awaits!
The Northern Lights are more than just a trending phenomenon; they are one of Earth's most sublime natural wonders. Capturing them is a challenge, an adventure, and an immensely rewarding experience. It requires patience, preparation, and a willingness to brave the cold, but the payoff is immeasurable.
Armed with this guide, you now have the knowledge and tools to transform your dream of photographing the Aurora Borealis into a stunning reality. Don't just witness the cosmic ballet; immortalize it. Go forth, chase the lights, and create images that will inspire awe and envy in equal measure.
Now it's your turn!
Plan your trip, pack your gear, and get ready for an unforgettable adventure. When you capture your own slice of Aurora magic, we'd love to see it! Share your incredible photos with us on social media using the hashtag #TripsoraAurora and tag us! Who knows, your photo might just be our next feature!
---