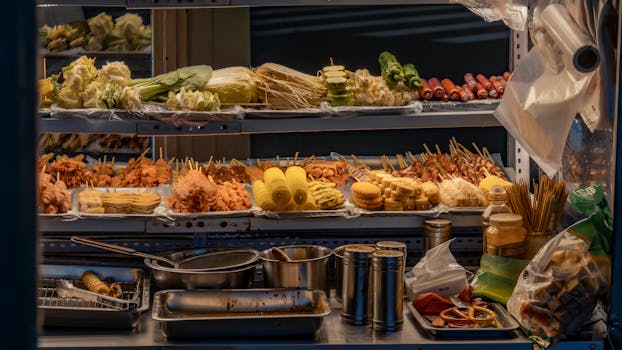
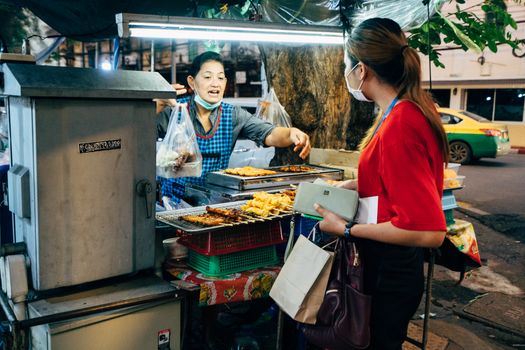
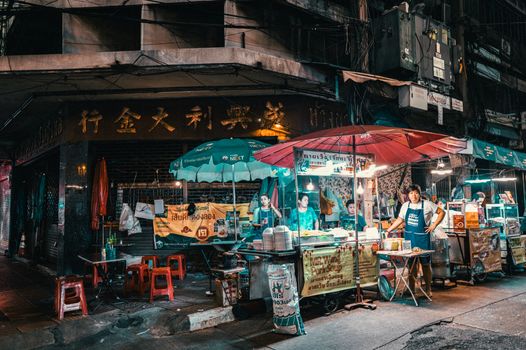
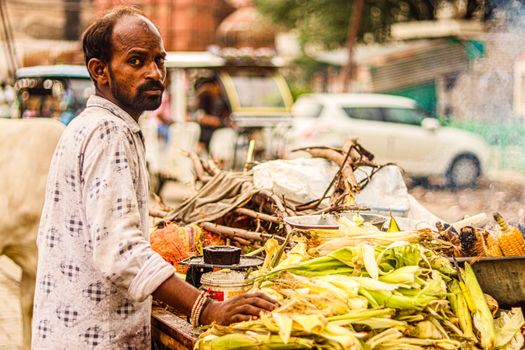
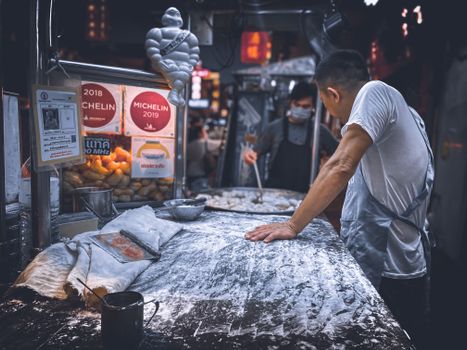
The aroma of sizzling garlic and chili oil hung heavy in the humid Bangkok air, mingling with the sweet scent of mango sticky rice. I was perched on a tiny plastic stool, chopsticks in hand, staring at the most incredible bowl of Pad See Ew I’d ever seen. The noodles, charred just right, glistened under the dim streetlamp, intertwined with tender chicken and crisp gai lan. My camera was ready. I snapped a photo. Then another. And another.
Later that night, scrolling through my gallery, a wave of disappointment washed over me. My photos, despite the culinary masterpiece before me, looked… flat. Lifeless. They didn't capture the electric energy of the street, the warmth of the vendor's smile, or that explosion of savory goodness that had just rocked my taste buds. They looked like any other tourist's hastily snapped picture – a mere record, not a story.
It was a pivotal moment. I realized that truly capturing food wasn't just about pointing and shooting. It was about seeing, feeling, and understanding the soul of a dish, just like the locals do. Over years of crisscrossing continents, from the bustling hawker centers of Singapore to the rustic trattorias of Rome, I’ve picked up tricks, observed masters, and learned to ditch the "tourist lens" for something far more authentic.
This isn't your average "how-to" guide. This is about unlocking the hidden art of local food photography – secrets that transform your snapshots into shareable, drool-worthy masterpieces that make your friends ask, "Where is that?!" Get ready to shoot food like a pro, the way locals capture their culinary heritage, and make every bite a viral sensation.
Beyond the Filter: Embracing the Raw Beauty of Local Cuisine
The biggest mistake I see travelers make is trying to make local food look "perfect" for Instagram. They’ll clear the table, adjust every crumb, and sometimes even use artificial lighting. But here’s the secret: locals don't do that. They embrace the chaos, the context, the beautiful imperfections. That's where the authenticity lies.
Think about it: when you’re devouring a Banh Mi from a street cart in Hanoi, are you thinking about symmetry? No! You’re experiencing the vibrant chaos of the street, the vendor’s quick hands, the steam rising from the fresh bread. Your photo should reflect that.
Actionable Tips for Raw Authenticity:
- Embrace the Environment: Don't just photograph the plate. Pull back a little. Let the bustling street scene blur gently in the background. Show the worn wooden table of that family-run ramen shop in Tokyo, the vibrant tile work of a tapas bar in Seville, or the rustic charm of a roadside eatery in rural Thailand. These elements tell a story far richer than a clean white plate ever could.
- Capture the Hands: Sometimes, the most powerful element is the human touch. A vendor’s calloused hands expertly grilling skewers, a local stirring a giant pot, or even your own hand reaching for a piece of fresh pita. It adds a human connection, a sense of scale, and instantly makes the image more relatable and dynamic.
- Don't Fear the "Mess": A stray crumb, a drip of sauce, a half-eaten portion – these aren't mistakes; they're evidence of enjoyment. They show life, flavor, and an experience in progress. A perfectly pristine plate can sometimes feel sterile. A little "mess" adds character and tells viewers, "Someone just devoured this!"
My Story:
I remember trying to perfectly stage a plate of Tacos al Pastor in Mexico City. I moved the limes, adjusted the cilantro, trying to get that "magazine shot." A local at the next table, seeing my struggle, just laughed. He pointed to his own plate, which was half-eaten, with salsa smeared on the side. "Es la vida," he said, "It's life." He then quickly snapped a photo with his phone, capturing not just the tacos, but the vibrant plastic tablecloth, the buzzing street, and his friend laughing in the background. His photo, imperfect as it was, had a soul mine lacked. I learned to loosen up that day.
Chasing Golden Hour Flavors: Natural Light is Your Best Friend
If there's one "secret sauce" to professional-looking food photography that locals instinctively use, it's natural light. Artificial, overhead restaurant lighting is often harsh, casting unflattering shadows and washing out colors. Locals know this and gravitate towards spots bathed in beautiful, soft light.
Think about your favorite food photos online – chances are, they're lit by the sun, not a fluorescent bulb. Natural light enhances textures, makes colors pop, and gives food that irresistible, mouth-watering glow.
Actionable Tips for Mastering Light:
- Seek the Window Seat: This is your holy grail. A seat by a window, especially if the sun isn't directly blasting through, provides soft, diffused light that's perfect for food. It creates gentle shadows that add depth and dimension.
- Embrace the Outdoors: Outdoor cafes, street food stalls, market eateries – these are natural light havens. Golden hour (the hour after sunrise and before sunset) is particularly magical, casting a warm, inviting glow on everything. Imagine a vibrant paella in Valencia, bathed in the late afternoon sun – pure magic!
- Understand Light Direction:
- Side Light: Light coming from the side of your dish is often the most flattering. It highlights textures and creates appealing shadows.
- Back Light: Light coming from behind the dish can create a beautiful rim light, making steam or translucent elements (like a perfectly poached egg yolk) glow. Be careful not to let the background get too overexposed.
- Avoid Direct Overhead Light: This is usually the least flattering, creating harsh, deep shadows. If you can't avoid it, try to use a menu or even your hand to block some of it and soften the effect.
- Use Reflectors (Even DIY Ones!): If one side of your dish is too dark, you can bounce light back onto it. A white napkin, a menu, or even a piece of white paper can act as a makeshift reflector to fill in shadows and brighten your dish.
My Story:
I was once in a dimly lit, incredibly authentic izakaya in Kyoto, trying to photograph the most exquisite plate of yakitori. The only light came from a single, weak bulb overhead. My photos were grainy and dull. I watched a group of local friends across the room. One of them, after receiving his dish, subtly shifted his plate closer to the entrance door, which had a small sliver of natural light spilling in. He then used his folded newspaper as a reflector to bounce that light back onto his food. The result? A perfectly lit, vibrant shot of his skewers, while mine looked like they were taken in a cave. It was a simple, ingenious move that instantly elevated his photo.
Framing the Feast: Creating a Narrative with Every Bite
A great food photo isn't just a picture of food; it's a visual story. It evokes a feeling, a memory, a desire. Locals, whether consciously or unconsciously, often compose their shots to include elements that tell a bigger story about their culture and their meal.
This involves thinking beyond the plate and considering the entire scene. How can you draw the viewer into the experience?
Actionable Tips for Compelling Composition:
- Rule of Thirds: Imagine a grid over your image (most cameras and phones have this option). Place your main subject (the dish) at the intersection of these lines, or along one of the lines, rather than dead center. This creates a more dynamic and pleasing composition.
- Angles Matter:
- Flat Lay (Overhead): Great for dishes with many components (like a tasting platter, a spread of tapas, or a complex street food meal) or when the top of the dish is most appealing. Think Instagram-worthy brunch spreads.
- 45-Degree Angle (Eye Level with the Food): This is often the most natural and versatile angle. It shows the height and texture of the food, mimicking how you'd see it from your seat. Perfect for burgers, cakes, or stacked dishes.
- Eye Level (Straight On): Best for dishes with significant height or layered elements, like a towering milkshake or a multi-layered cake. It creates intimacy.
- Incorporate Supporting Elements:
- Utensils: Neatly placed chopsticks, a rustic fork, or even your own hand holding a spoon can add context and a sense of action.
- Drinks: A local beer, a vibrant cocktail, or a cup of traditional tea next to the dish adds to the atmosphere.
- Background Blur (Bokeh): Use a wider aperture (on DSLR) or Portrait Mode (on smartphones) to blur the background, making your food pop. Just make sure the blurred elements still hint at the location (e.g., a blurry market stall, not just a blob of color).
- Leading Lines: Use elements like table edges, cutlery, or even the arrangement of ingredients to lead the viewer's eye towards your main subject.
- Look for Color and Texture Contrast: A vibrant garnish on a neutral dish, or a smooth sauce next to crunchy fried elements. These contrasts make your photos more visually engaging.
My Story:
In a quaint café in Paris, I was trying to photograph a perfectly flaky croissant and a rich café au lait. I took a few shots, but they felt static. Then I noticed the elderly woman at the next table, casually reading her newspaper, her hand reaching for a piece of her own croissant. I subtly shifted my angle, blurred her slightly in the background, and included the corner of her newspaper, a tiny silver spoon, and the steam rising from my coffee cup. The photo immediately transformed. It wasn't just breakfast; it was a Parisian morning, a quiet moment, a story unfolding.
From Smartphone to DSLR: Tools for Every Budget
You don't need a professional camera rig to take amazing food photos. In fact, some of the most authentic, shareable shots I've seen were taken on a smartphone. The "best camera" is always the one you have with you. Locals, more often than not, are using their phones – and they’re getting incredible results because they understand the principles above.
Actionable Tips for Your Gear:
- Smartphone Power:
- Clean Your Lens: This sounds obvious, but a smudged lens is the enemy of a crisp photo. A quick wipe on your shirt can make all the difference.
- Tap to Focus & Adjust Exposure: Don't just point and shoot. Tap on your food subject to ensure it's in focus. Then, slide your finger up or down on the screen to adjust the exposure. Make it slightly brighter than you think you need – you can always bring it down in editing.
- Portrait Mode (Bokeh Effect): Most modern smartphones have a portrait mode that beautifully blurs the background, making your food stand out. Experiment with it!
- Burst Mode: If you're photographing something dynamic (like steam rising or a chef plating), use burst mode to capture a series of shots, then pick the best one.
- Basic DSLR/Mirrorless Gear:
- Prime Lens: If you have a DSLR or mirrorless camera, a 50mm f/1.8 lens (often called a "nifty fifty") is an affordable powerhouse. Its wide aperture creates beautiful background blur and works wonderfully in low light.
- Macro Lens: For extreme close-ups that reveal intricate textures, a macro lens is fantastic, but certainly not essential for most travel food photography.
- Essential Accessories (Optional but Helpful):
- Portable Reflector: A small, collapsible reflector (you can find them online for $10-20) is a game-changer for bouncing light and filling shadows.
- Mini Tripod: A small, flexible tripod (like a Joby Gorillapod) can be useful for flat lays or low-light situations to keep your shots steady.
- Editing Apps (Your Digital Darkroom):
- Lightroom Mobile: Powerful and free (for basic features), offering excellent control over exposure, colors, and shadows.
- Snapseed: Google's free editing app is incredibly intuitive and has fantastic selective adjustment tools.
- VSCO: Great for quick, stylish filters and subtle adjustments.
- Focus on Enhancing, Not Over-Processing: A little boost in contrast, saturation, and sharpness can make your food pop. Avoid heavy filters that make your food look unnatural. The goal is to make it look better, not fake.
My Story:
For years, I lugged around my heavy DSLR kit, convinced it was the only way to get "pro" shots. Then, on a trip to Singapore's Lau Pa Sat hawker center, I saw a young local woman effortlessly snapping stunning photos of her satay and chili crab with just her iPhone. Her photos were crisp, vibrant, and perfectly composed. She showed me how she quickly adjusted exposure and used a subtle filter in Snapseed. It was a revelation. While my DSLR still has its place, my iPhone has become my primary food photography tool for its convenience and ability to capture spontaneous, authentic moments without drawing too much attention.
The "Local's Eye" Techniques: Unlocking Hidden Culinary Photo Ops
This is where you truly go beyond being a tourist. Locals have an innate understanding of their culinary landscape – where the best food is, how it's prepared, and what makes it special. To photograph food like a local, you need to think like one.
Actionable Tips for the Local's Eye:
- Observe, Don't Just Look: Before you even raise your camera, take a moment. What are the locals doing? How are they interacting with their food? Are they sharing? Are they eating quickly, or savoring every bite? This observation will inform your shot.
- Ask for Recommendations (in Local Language if Possible): "Do you have a favorite dish?" or "Where do you eat the best [local specialty]?" A genuine question, even if broken, can open doors to hidden gems that aren't in any guidebook. And often, these places offer the most authentic and visually rich experiences.
- Capture the Process: Sometimes the story isn't just the finished plate, but the journey. The chef expertly flipping noodles in a wok, the baker kneading dough, the street vendor meticulously arranging ingredients. These "behind-the-scenes" shots add immense value and narrative. Always ask permission first, especially if people are involved. A simple smile and a gesture with your camera often works wonders.
- Eat Where Locals Eat: This goes without saying, but avoid the tourist traps. Venture a few blocks away from the main square. Look for places packed with locals, even if they look unassuming. These are often the places with the most authentic food and the most interesting photo opportunities.
- Respect Culture and Privacy: This is paramount. Always be discreet. Don't disrupt someone's meal for a photo. If you want to photograph a person (a vendor, a chef), always ask for permission first. A quick "May I take a photo?" (or its local equivalent) goes a long way. If they say no, respect it.
My Story:
In a small village outside of Rome, I stumbled upon a tiny panificio (bakery) where a nonna was making fresh bread. The aroma was intoxicating. I hesitated to take a photo, feeling like an intruder. But I walked in, bought a loaf, and as she wrapped it, I gestured to my camera and asked, "Posso scattare una foto?" (Can I take a photo?). She smiled, nodded, and then, without prompting, started playfully posing with a giant wooden peel and a flour-dusted apron. The photos I got of her, her weathered hands, and the rustic oven were far more powerful than any picture of just the bread itself. It was a moment of connection, and that's what truly elevates a food photo.
Conclusion: Your Plate, Your Story, Your Viral Shot
Food photography, at its heart, is storytelling. It’s about more than just documenting what you ate; it’s about capturing the essence of a culture, the passion of its people, and the unforgettable moments that make travel so magical. By embracing authenticity, mastering natural light, composing with intention, utilizing your tools wisely, and seeing through a local's eyes, you’re not just taking pictures – you’re creating edible art.
So, the next time you find yourself in front of a steaming bowl of pho in Vietnam, a vibrant curry in India, or a simple yet perfect pizza in Naples, remember these secrets. Ditch the tourist lens, connect with the moment, and let your camera tell the story. Your taste buds (and your Instagram followers) will thank you.
Now it's your turn! Grab your camera (or phone!), explore, experiment, and share your incredible food stories. Tag #TripsoraFoodPro so we can see your masterpieces and feature our favorites! What’s the most authentic food photo you’ve ever taken? Share your tips and experiences in the comments below!
---