The Secret Sauce: Photographing Food Like a Pro Before It Hits the Mainstream
There’s a specific kind of magic that happens when you stumble upon a tiny, unassuming eatery, a bustling street food stall, or a grandmother’s kitchen in a far-flung corner of the world. You know the feeling – that tantalizing aroma, the vibrant colors, the genuine smiles. It’s a moment of pure, unadulterated culinary discovery.
I remember it vividly: I was navigating the labyrinthine back alleys of Hoi An, Vietnam, years ago, long before it became the Instagram hotspot it is today. My stomach was rumbling, and my eyes darted across handwritten signs. Then, a scent hit me – a complex symphony of grilled pork, fresh herbs, and something sweet and savory. I followed my nose to a small cart, barely a hole in the wall, where an elderly woman was meticulously assembling Bánh Mì Phượng. The bread was impossibly crispy, the fillings bursting with flavor, and the chili sauce had just the right kick. I wolfed it down, mesmerized, and only after the last crumb was gone did I realize: I hadn't taken a single photo.
And not just any photo – a great photo. One that captured the steam rising, the texture of the baguette, the vibrant greens of the cilantro, the weathered hands of the vendor. A photo that would have transported anyone who saw it right there, right then, before the lines stretched down the street and every travel blogger had their shot. That moment became my personal culinary photography epiphany. It taught me the true value of not just finding these incredible, pre-mainstream food experiences, but also capturing them with the reverence and skill they deserve.
You see, anyone can snap a picture of a dish at a famous restaurant. But to find that hidden gem, to capture its essence, its story, its soul, before the world discovers it? That’s where the real artistry – and the real viral potential – lies. It’s about becoming a culinary explorer and a visual storyteller rolled into one. And trust me, it’s easier than you think.
So, ditch the tourist trap menus and let’s dive into how you can photograph food like a seasoned pro, long before it becomes the next big thing on everyone’s feed.
1. The Hunt: Unearthing Culinary Treasures Off the Beaten Path
The first step to photographing pre-mainstream food is, well, finding it. This isn't about scrolling through popular hashtags; it's about genuine exploration.
My Go-To Strategies:
- Talk to Locals: This is hands down the most effective method. Ask your Airbnb host, a friendly shop owner, or even your taxi driver where they eat. Not where tourists eat, but where they go for authentic, delicious food. In Rome, I once asked a barista where he’d go for a truly local carbonara, and he pointed me to a tiny, unmarked trattoria down a side street. It was pure magic, and the dish was divine.
- Wander with Purpose (and a Nose!): Sometimes, the best discoveries are made by simply getting lost. Walk away from the main squares and tourist zones. Pay attention to busy sidewalks, especially around lunchtime or dinner. Follow enticing aromas. Look for places with only local patrons – that’s usually a dead giveaway.
- Google Maps & Local Blogs (with a twist): Instead of searching "best restaurants in [city]," try "local eateries [city]," "street food [city]," or even "hidden gem restaurants [city]" in the local language if you can. Look for blogs written by locals, not just international travel sites. These often highlight smaller, less-known spots.
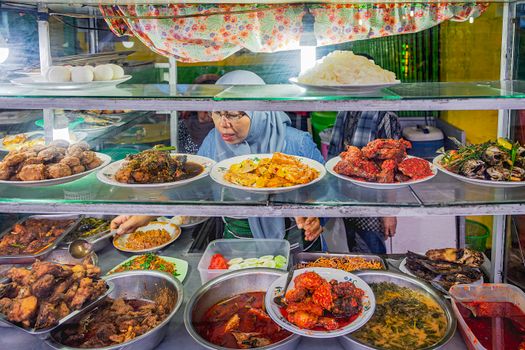
- Observe Vendor Interaction: At markets, watch which stalls the locals flock to. Is there a consistent line? Are the vendors chatting warmly with customers? These are signs of quality and community, often leading to fantastic photo opportunities.
Once you've found your spot, observe the surroundings. Is there natural light? Is it bustling or quiet? All these elements will contribute to the story you're about to tell with your camera. Remember, these places often don't have professional lighting setups, which is precisely where your skill comes in!
2. Light is Your Secret Sauce (And It's Free!)
Forget expensive studio lights. For authentic, pre-mainstream food photography, natural light is your best friend. It’s flattering, it’s free, and it’s everywhere.
Mastering Natural Light:
- Seek Out Open Shade: Direct sunlight can be harsh, creating unflattering shadows and blown-out highlights. Look for an area under an awning, a large tree, or even just a few feet back from a sunny window. This provides soft, diffused light that will make your food look vibrant and appetizing.
- The "Window Light" Trick: If you're indoors, position your dish near a window. Don't place it in the direct sunlight coming through the window, but rather a little to the side, allowing the window to act as a large, soft light source. In a small café in Paris, I once moved my croissant and coffee closer to a window, turning a dull shot into a light-filled, inviting scene.
- Backlight for Drama: Sometimes, placing the food between you and a light source (like a window or the sun during golden hour) can create beautiful rim lighting, highlighting textures and adding a gorgeous glow. Be careful not to block too much light with your own shadow!
- Avoid Overhead Lighting: Many restaurants have harsh overhead lights that cast ugly shadows. Try to reposition your dish slightly or move to a spot where the overhead light isn't directly above your food.
- Use a Reflector (DIY Style): A simple white napkin, a piece of paper, or even your phone screen can act as a reflector, bouncing light back onto the shadowy side of your dish to even out the lighting. This is crucial for adding sparkle to sauces or highlighting details.
The goal isn't to perfectly illuminate every inch but to use light to enhance texture, color, and mood. Think about the story the light tells – is it a bright, fresh morning meal, or a cozy, intimate dinner?
3. Composition: Framing Your Culinary Masterpiece
Composition is how you arrange the elements within your frame. It's what turns a snapshot into a work of art, telling a visual story that makes your audience crave what they see.
Key Composition Techniques:
- The Overhead Shot (Flat Lay): This is a classic for a reason, especially for colorful, intricately plated dishes or a spread of various items. Get directly above your food, parallel to the table. This angle works beautifully for showcasing patterns, textures, and the overall spread. I use this extensively for market finds like a vibrant array of tacos in Mexico City or a Vietnamese street food platter.
- The 45-Degree Angle (Eye Level): Mimicking how you’d naturally view the food, this angle is great for dishes with some height or depth, like a towering burger, a bowl of ramen, or a stack of pancakes. It gives a sense of realism and invites the viewer to imagine taking a bite.
- The Straight-On Shot: For beverages, cocktails, or dishes with interesting front-facing details (like a layered cake), shooting straight on can be very impactful. It creates a more intimate feel.
- Rule of Thirds: Imagine your frame divided into nine equal squares by two horizontal and two vertical lines. Place your subject or key elements along these lines or at their intersections for a more dynamic and balanced composition. Avoid always centering your food.
- Negative Space: Don't be afraid of empty space! It can draw attention to your main subject and create a sense of calm and elegance. A single, perfectly crafted pastry on a simple plate with plenty of space around it can be incredibly powerful.
- Leading Lines: Look for lines in the scene – a fork leading to the dish, the edge of a table, the pattern on a placemat – and use them to guide the viewer's eye towards your food.
- Depth of Field (Bokeh): If your camera (or phone) allows, use a shallow depth of field to blur the background, making your food pop. This isolates your subject and creates that creamy, dreamy "bokeh" effect that instantly elevates a photo.
Experiment with different angles and compositions for each dish. You’ll be surprised at how much difference a slight shift in perspective can make.
4. Props & Styling: Authenticity Over Perfection
When photographing food at local, pre-mainstream spots, you won't have a styling kit. And that's perfectly fine – in fact, it's better! The goal is authenticity, not a sterile studio shot.
Embracing Authentic Styling:
- Use What's There: The beauty of these hidden gems is their natural environment. Use the existing table surface – a rustic wooden table, a patterned plastic tablecloth, or even the street vendor's cart – as your backdrop. The local cutlery, a unique ceramic bowl, or a traditional glass for a drink can be fantastic props.
- Subtle Human Element: A hand reaching for a piece of bread, chopsticks poised over noodles, or a glass being raised in a toast adds a human touch and makes the scene relatable. It tells a story of interaction. Just be mindful not to distract from the food.
- Embrace Imperfection: A stray crumb, a slight smudge, or a bit of sauce on the rim of the plate can add character and authenticity. These aren’t "mistakes"; they’re part of the real-life experience.
- Add Local Flair: Is there a unique spice blend, a fresh herb, or a traditional drink served with the dish? Include it subtly in the frame. In Oaxaca, Mexico, I photographed a tlayuda with a small cup of potent mezcal and a few chili peppers on the side – instantly grounding the dish in its origin.
- Background Blurring (Bokeh): If your camera or phone allows, blur the background to keep the focus on the food while still hinting at the vibrant atmosphere of the place. This creates a professional, polished look without needing complex props.
- Keep it Simple: Don't overcrowd the frame. The food should always be the star. A few well-chosen, natural elements are far more effective than a cluttered scene.
The key is to enhance, not overshadow, the natural beauty of the food and its setting. Think about creating an inviting scene rather than just a picture of food.
5. From Snap to Share: Editing for Impact (Without Losing Authenticity)
Taking the photo is only half the battle. Editing is where you refine your vision and make your food pop, ready for your Tripsora blog and social media. The good news is, you don't need complex software. Your phone is a powerful editing studio!
My Go-To Mobile Editing Apps:
- Lightroom Mobile (Free Version): Offers powerful control over light, color, and detail.
- Snapseed (Free): Google's app is incredibly intuitive for quick, effective edits.
- VSCO (Free/Paid): Great for adding subtle, consistent filters that maintain an authentic feel.
Essential Editing Adjustments:
- Exposure: Adjust overall brightness. If your photo is too dark, lighten it; too bright, darken it. Aim for a natural look.
- Contrast: Increase contrast slightly to make colors pop and add depth. Be careful not to overdo it, or your image will look artificial.
- Highlights & Shadows: These are crucial. Reduce highlights to recover detail in bright areas (like a shiny sauce), and lift shadows to reveal details in darker areas (like the texture of a crusty bread).
- White Balance: This corrects the color temperature. If your photo looks too yellow/orange (warm) or too blue (cool), adjust the white balance to make whites appear truly white. This is vital for making food colors look accurate and appetizing.
- Saturation & Vibrance: A slight boost in saturation can make colors more vivid. Vibrance is often a better choice as it selectively boosts less saturated colors without overdoing skin tones or already vibrant hues. Don't go overboard – food should look delicious, not cartoonish.
- Sharpness: A tiny boost in sharpness can make details crisper. Avoid over-sharpening, which can introduce graininess.
- Crop & Straighten: Always ensure your horizons are straight and crop out any distracting elements. Sometimes, a tight crop focusing on a specific detail can be more impactful.
- Subtle Vignette: A very slight darkening of the edges can help draw the eye to the center of the frame, where your delicious food lies.
Remember, the goal is to enhance the photo, not to fundamentally alter reality. You want your followers to feel like they could step right into that scene and taste that dish, not wonder if it's photoshopped. Authenticity is king, especially when showcasing pre-mainstream discoveries.
6. Ethics & Etiquette: Being a Respectful Food Photographer
This is perhaps the most important, yet often overlooked, aspect of photographing food, especially in local, non-touristy settings. You are a guest in someone's culinary space.
Be a Conscious Creator:
- Always Ask Permission: Before you start snapping away, especially in small family-run establishments or at street food stalls, politely ask if it’s okay to take photos. A simple "Permiso para una foto?" or "Can I take a picture?" with a smile goes a long way. Most people are happy to oblige, especially if you then show genuine appreciation for their food.
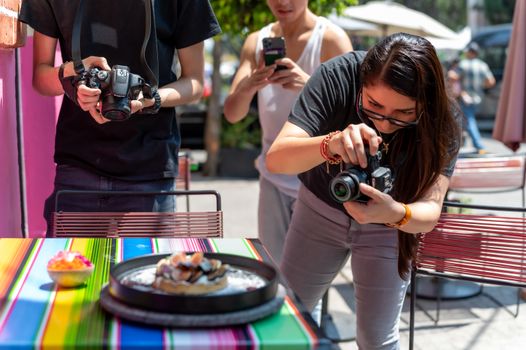
- Be Quick & Discreet: Don't spend an eternity arranging and shooting, especially if the place is busy. Get your shots efficiently. Avoid blocking pathways or disturbing other diners. Your food should still be warm when you eat it!
- Support the Business: You’re enjoying their food and their hospitality. Make sure you actually purchase something, and consider leaving a generous tip if appropriate. Your photos are free marketing for them, so show your gratitude.
- Don't Disturb Other Diners: Nobody wants a flash going off in their face or someone hovering over their meal. Be mindful of your surroundings and other patrons' privacy and enjoyment.
- Engage with Vendors/Chefs: A compliment about their food or a genuine question about a dish can open doors to incredible stories and even better photo opportunities. I've had vendors proudly pose with their creations after a sincere compliment about their craft.
- Be Patient: Sometimes the best shot comes from waiting for the perfect moment – a ray of sun, a lull in the crowd, or the chef adding a final flourish.
Your presence as a photographer should be a positive one. By being respectful and appreciative, you not only get better photos but also contribute positively to the local community you're exploring.
The Taste of Discovery: Your Next Viral Story Awaits
Photographing food like a pro, especially those hidden, pre-mainstream gems, isn't just about technical skill. It's about curiosity, respect, and a genuine love for culinary exploration. It's about telling a story that hasn't been over-told, capturing a moment that feels truly unique.
By mastering natural light, thoughtful composition, authentic styling, and mindful editing, you're not just taking pictures; you're crafting narratives. You're giving these incredible, unsung culinary heroes the spotlight they deserve, and in doing so, you're creating content that is fresh, inspiring, and inherently shareable.
So, next time you're on your travels, put away the guidebooks for a moment. Trust your instincts, follow your nose, and engage with the locals. Find that unassuming noodle stall, that tiny bakery, or that vibrant market vendor. Then, armed with these tips, capture its magic. Your followers will not only crave the food but also the adventure of finding it.
Now go forth, explore, and create mouth-watering, scroll-stopping content that will make your Tripsora audience drool and inspire their next, truly authentic, culinary journey. What hidden food gem will you discover and photograph first? Share your adventures with us using #TripsoraFoodFinds!
---