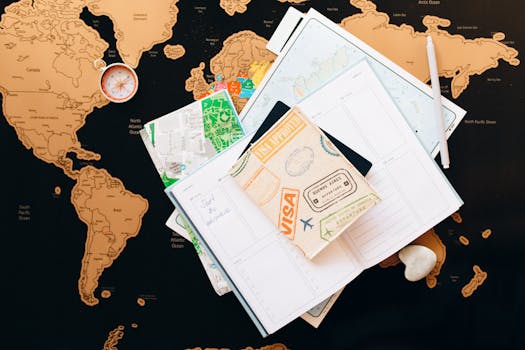
Choosing a country for a remote work visa is the fun part. The application is the part that tests your patience. Many low-cost programmes are designed to be simple, yet people still lose weeks to a missing stamp, an expired document or a bank statement in the wrong format.
This checklist walks through the process in the order that tends to save the most time. It does not name one single country, because requirements differ, but it applies to most affordable nomad and remote-worker programmes around the world. Always confirm the exact rules, fees and forms on the official government or embassy website for the country you have chosen. Details change, and no third-party article, including this one, should replace the official page.
Step 1: Confirm you are eligible before you spend anything
Before you pay for translations or insurance, make sure you meet the basic conditions. Most programmes ask a version of the following.
- You are a citizen of an eligible country, or are applying from a country where the consulate accepts applications.
- You work remotely for an employer or clients located outside the destination country.
- You meet a minimum income or savings threshold, usually stated per month or per year.
- You have no serious criminal record, and a clean immigration history.
- You are an adult, or are applying with a qualifying family member.
If one of these is a clear no, stop there and move to another country. If it is unclear, write to the consulate with a short specific question and keep the reply.
Step 2: Read the official page twice
The first read gives you the outline. The second read is for the details that cause problems.
Look for these items.
- Whether documents must be originals, certified copies or scans.
- Whether documents must be translated by a sworn or certified translator.
- How recent each document must be. A police certificate or bank statement might need to be dated within the past one to three months.
- Whether the application is online, by post or in person.
- Whether there is a separate fee for biometrics, a courier or a residence card.
Make a simple spreadsheet or note listing each requirement, the date you obtained it and its expiry. This single document will save you from repeating work.
Step 3: Check your passport
Many programmes require a passport valid for at least six months beyond your intended stay, with empty pages for stamps. If your passport is close to expiry, renew it first. Renewal can take weeks, and you will need the new passport number on every form.
Step 4: Gather proof of remote work
This is where freelancers and employees differ.
Employees
usually need an employment contract or letter from the employer confirming:
- Your job title and start date.
- That you are allowed to work remotely from abroad.
- Your salary.
- The company name, address and contact details.
Ask your employer early. Human resources departments often need time, and some will want to check tax or legal implications of an employee working abroad. A letter that says "work from anywhere" is much stronger than silence.
Freelancers and self-employed people
often need:
- Contracts or invoices with clients outside the destination country.
- Business registration documents if you have a company.
- Several months of bank statements showing regular income.
- A short cover letter explaining your work.
Keep the paperwork organised by client and month. Clear, consistent documents move through review faster.
Step 5: Prove your income
Income rules are the most common reason for rejection. Pay attention to how the threshold is stated.
- Is it gross or net?
- Is it monthly average over a period, or total savings?
- Which currencies are accepted, and what exchange rate is used?
If you are close to the threshold, a bank statement showing a healthy buffer helps. If you are well over, still include a clean summary. Officers read many files, and a clear one is easier to approve.
Step 6: Arrange health insurance
Most programmes require medical insurance that covers the full duration of your stay in the destination country. Some insist on a minimum coverage amount, and some specify that it must cover hospital treatment and repatriation.
Practical tips:
- Read the visa wording about insurance before you buy a policy.
- Ask the insurer for a certificate in English or the local language that names the destination, dates and coverage level.
- Make sure the dates on the certificate match your planned stay, not a shorter period.
- Check exclusions such as pre-existing conditions, adventure sports and mental health care.
This is general guidance rather than insurance advice. If you have a medical condition, speak to a broker or insurer about suitable cover.
Step 7: Get a criminal record certificate
Many programmes ask for a police clearance from your country of residence, and sometimes from countries where you lived in the past few years. Processing time varies widely, so request it early. Check whether it must be apostilled or legalised, and whether it must be recent.
Step 8: Apostilles and translations
An apostille is a certificate that authenticates a public document for use abroad in countries that are part of the relevant international convention. Your government agency or foreign ministry can explain how to obtain one. Some countries need a different form of legalisation.
Translations are usually required if documents are not in the official language or English. Use a translator who meets the destination's requirements, such as being sworn or certified. A cheap uncertified translation can be rejected, leading to repeated fees.
Step 9: Prepare passport photos and forms
It sounds minor, but photo requirements are strict. Size, background colour, and facial expression are all specified. Take photos at a shop that knows the standards for the country you are applying to. Complete forms in block capitals or online exactly as the passport spells your name.
Step 10: Plan accommodation proof
Some programmes ask for evidence of where you will stay, such as a rental contract or a hotel booking. Choose a refundable booking and confirm that it will be accepted. Do not sign a long lease before approval unless you have a free exit clause.
Step 11: Submit, pay and keep receipts
Use only the official portal or embassy. Be cautious of lookalike sites that charge for free forms. Pay the fee by the method required and keep the receipt. Save a copy of everything you submit, plus confirmation emails and reference numbers.
Step 12: Prepare for the wait
Processing times are estimates, not promises. Avoid booking non-refundable flights until you have a decision. If you have a hard start date, such as a lease or a contract, apply with generous margin.
Step 13: After approval
When the visa is granted, check these details immediately.
- Name spelling, passport number and dates are correct.
- Entry window, which is the period within which you must arrive.
- Whether you must register with local authorities or collect a residence card after arrival.
- Whether there are conditions such as a requirement to remain insured or to report changes.
Common mistakes that cause delays
- Submitting documents that are too old.
- Uncertified translations.
- Insurance that covers fewer days than the visa.
- Income evidence that does not match the stated threshold.
- Name differences between documents, such as a missing middle name.
- Applying through an unofficial website.
- Booking non-refundable travel too early.
- Ignoring post-arrival steps such as registration.
A sample timeline
This is only a rough guide.
- Eight to twelve weeks before departure: research, choose the country and read the official page twice.
- Eight weeks: request police certificates and employer letters.
- Six weeks: obtain apostilles and translations.
- Four weeks: buy insurance, assemble the file and submit.
- Two weeks: follow up politely if the stated processing time has passed.
- On approval: book travel and accommodation.
Shorten or lengthen according to the rules you find.
Frequently asked questions
Can I apply from a country that is not my home country?
Sometimes, if you hold legal residence there. Policies vary, so check whether the consulate accepts applicants who are not citizens or residents of that location.
Do I need to pay taxes on my income after moving?
Possibly. Tax residency depends on how long you stay and the laws of both countries. This article provides general information only. Consult a qualified tax adviser.
What if my application is rejected?
You will usually receive a reason. Some decisions can be appealed or reapplied after fixing the issue, such as adding missing documents. Check what the official page says about refunds, which are often not available.
Can I travel to other countries while I wait?
Often yes, but do not leave if your passport is being held for processing. Confirm with the embassy.
Summary
A successful visa application is mostly about preparation. Confirm eligibility, read the official page carefully, collect documents in order of how long they take, match your insurance and income evidence to the stated requirements, and use only official channels. Keep copies of everything and leave extra time. Done calmly, the process is straightforward, and the reward is a smooth start to life abroad.