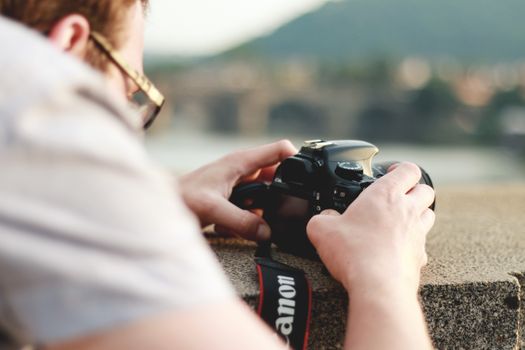
Hey fellow adventurers and aspiring visual storytellers! Sarah here, your go-to wanderlust guru from Tripsora, and today we're diving deep into the one thing that can elevate your travel photos from "meh" to "MAGNIFICENT": your camera settings.
I still remember my first "big" trip to Santorini. I’d saved for years, dreamt of those iconic blue domes against the Aegean Sea, and splurged on a fancy new DSLR. I came home, eager to relive the magic, only to find a memory card full of blurry sunsets, washed-out whites, and oddly yellow-tinged buildings. My heart sank faster than a forgotten sock in a hotel laundry. I had the gear, I had the dream destination, but I completely missed the mark on how to capture it.
That moment was my turning point. I realized that a beautiful camera is just a tool; it's the artist behind the lens, understanding their craft, that makes the masterpiece. And guess what? That artist can be YOU. You don't need a photography degree or years of experience. You just need to understand a few fundamental camera settings, and I promise, your travel photos will never be the same. This isn't just about taking pictures; it's about preserving your most cherished memories with the clarity, emotion, and vibrancy they deserve. Ready to ditch auto mode for good? Let's go!
Beyond Auto Mode: Mastering the Exposure Triangle (Aperture, Shutter Speed, ISO)
This is the holy trinity of photography, the foundation upon which every stunning image is built. Think of them as three legs of a stool: change one, and you often need to adjust the others to keep your photo perfectly balanced in terms of brightness (exposure).
1. Aperture (f-stop): Your Depth-of-Field Dream Weaver
- What it is: The opening in your lens that controls how much light hits your sensor AND how much of your image is in focus. Measured in f-numbers (e.g., f/1.8, f/4, f/11).
- The Magic:
- Smaller f-number (e.g., f/1.8, f/2.8): A wider opening, letting in more light. This creates a shallow depth of field, meaning your subject is sharp, and the background is beautifully blurred (that creamy "bokeh" effect everyone loves). Perfect for portraits, food shots, or isolating a specific detail.
- Travel Tip: When I was in Paris, capturing a street performer near the Pont Neuf, I used f/2.8 on my 50mm lens. The performer popped, and the busy Parisian backdrop melted into a soft, artistic blur. It instantly made the image feel more intimate and professional.
- Larger f-number (e.g., f/8, f/11, f/16): A narrower opening, letting in less light. This creates a deep depth of field, meaning more of your scene, from foreground to background, is in sharp focus. Ideal for landscapes, architecture, or group shots.
- Travel Tip: Hiking through Patagonia, I wanted to capture the grandeur of the Fitz Roy mountain range. I set my aperture to f/11 or f/16 to ensure the jagged peaks, the glacial lakes, and even the wildflowers in the foreground were all tack-sharp. There's nothing worse than a blurry mountain!
2. Shutter Speed: Freezing Time or Embracing Motion
- What it is: How long your camera's shutter stays open, allowing light to reach the sensor. Measured in fractions of a second (e.g., 1/250s, 1/30s) or full seconds (e.g., 2s, 30s).
- The Magic:
- Fast Shutter Speed (e.g., 1/500s, 1/1000s): Freezes action. Great for capturing fast-moving subjects like wildlife, sports, or bustling street scenes without blur.
- Travel Tip: In the vibrant Jamaa el-Fna square in Marrakech, I used 1/500s to perfectly freeze the acrobats mid-air and the swirling smoke from the food stalls. No motion blur, just crisp, dynamic action.
- Slow Shutter Speed (e.g., 1/30s, 1s, 10s+): Creates motion blur. Use it to convey movement (e.g., silky waterfalls, streaking car lights, blurring crowds). Requires a tripod for anything slower than 1/60s (unless you have incredibly steady hands or image stabilization).
- Travel Tip: The Seljalandsfoss waterfall in Iceland was begging for that ethereal, misty look. I mounted my camera on a tripod and used a 2-second exposure at f/11. The water transformed into a dreamy, silky cascade – pure magic! For bustling city scenes like Tokyo's Shibuya Crossing at night, a 5-10 second exposure can make pedestrians disappear into ghostly streaks, highlighting the lights and architecture.
3. ISO: Your Camera's Light Sensitivity (Use Sparingly!)
- What it is: Your camera sensor's sensitivity to light. Measured in numbers (e.g., 100, 400, 1600, 6400).
- The Magic:
- Low ISO (e.g., 100, 200): Less sensitive to light, produces the cleanest, most noise-free images. Always aim for the lowest possible ISO in good lighting.
- Travel Tip: On a bright, sunny beach in Bali, I always stick to ISO 100. It ensures my photos are crisp, vibrant, and free from any digital "grain."
- High ISO (e.g., 1600, 3200, 6400): More sensitive to light, allowing you to shoot in darker conditions without a flash. The trade-off? Increased "noise" or graininess in your photos, especially at very high ISOs.
- Travel Tip: Exploring a dimly lit temple in Bangkok, I had to bump my ISO up to 1600 (sometimes even 3200) to get a properly exposed shot without a tripod. The slight grain was a small price to pay for capturing the intricate details of the Buddha statues. Modern cameras handle higher ISOs much better, but always be mindful of the noise.
Actionable Advice:
Start by setting your camera to Manual (M) mode. It might feel intimidating, but it's the best way to truly understand how these three settings interact. Experiment! Take the same shot with different settings and see the dramatic changes.
Don't Let Your Colors Lie: The Power of White Balance
You know that feeling when you take a photo, and the colors just look… off? Maybe too yellow, too blue, or just dull? That's your white balance crying for attention!
- What it is: White balance (WB) tells your camera what "white" should look like under different lighting conditions. Our eyes adjust automatically, but cameras need a little help.
- The Magic:
- Presets are your friend (mostly): Your camera has built-in presets like Auto (AWB), Daylight, Cloudy, Shade, Tungsten (for incandescent bulbs), and Fluorescent. These are great starting points.
- Travel Tip: On a bright, sunny day in Rome, 'Daylight' or 'Sunny' WB will ensure your ancient ruins and gelato look true to life. If a sudden cloud rolls over the Amalfi Coast, switch to 'Cloudy' to prevent your photos from looking too blue.
- Custom White Balance (CWB): Your Secret Weapon: This is where the pros shine. In tricky or mixed lighting, 'Auto' WB can get confused. CWB allows you to tell your camera exactly what white is by taking a reference shot of a white or grey object.
- Travel Tip: I once shot inside a beautiful, but very dimly lit, cathedral in Seville. The stained glass cast complex colors, and Auto WB was producing a sickly yellow-green tint. I found a small, white brochure, took a custom white balance reading, and suddenly, the stone walls and intricate carvings looked perfectly natural. It's a game-changer for interior shots or specific artificial lighting.
Actionable Advice:
While AWB is convenient, be aware of its limitations. For critical shots, especially in unusual lighting, experiment with presets or, better yet, learn to set a custom white balance. And always, always shoot in RAW (more on this later!) – it gives you the most flexibility to adjust white balance in post-processing without losing quality.
Pin-Sharp Perfection: Mastering Focus & Metering Modes
A blurry subject is a missed opportunity. Getting your subject in sharp focus is paramount, and understanding your camera's focus and metering modes is key.
1. Autofocus Modes: Hitting Your Target Every Time
- Single-Shot Autofocus (AF-S / One Shot AF):
- What it is: Your camera focuses once when you half-press the shutter button and then locks that focus. Best for stationary subjects.
- Travel Tip: Perfect for posed portraits in front of the Eiffel Tower, still-life shots of vibrant street food in Vietnam, or capturing a majestic temple in Kyoto. Focus on your subject's eyes, half-press, recompose if needed, and shoot.
- Continuous Autofocus (AF-C / AI Servo AF):
- What it is: Your camera continuously adjusts focus as your subject moves, as long as you keep the shutter button half-pressed.
- Travel Tip: Essential for capturing dynamic scenes! Think street performers in Barcelona, wildlife darting through the Amazon rainforest, or kids playing on a beach in Thailand. I used AF-C to nail the shot of a vibrant macaw taking flight in Costa Rica – it tracked the bird perfectly as it soared.
- Auto Autofocus (AF-A / AI Focus AF):
- What it is: The camera tries to guess if your subject is moving or still and switches between AF-S and AF-C.
- Travel Tip: While convenient, I generally discourage using this for critical travel photos. Let you decide what's important, not the camera.
2. Focus Points: Precision Targeting
Most cameras have multiple autofocus points. Don't just rely on the center!
* Travel Tip: Learn how to select specific focus points. For portraits, I always choose a focus point over my subject's eye. For a landscape, I'll pick a prominent detail in the mid-ground. This gives you much more control over what's sharp.
3. Metering Modes: The Right Brightness, Every Time
Metering tells your camera how to measure the light in a scene to achieve correct exposure.
- Evaluative / Matrix Metering:
- What it is: The camera analyzes the entire scene, looking at brightness, contrast, and subject distance, to determine the best overall exposure.
- Travel Tip: This is your go-to for most general travel scenes – landscapes, cityscapes, and well-lit environments. It's intelligent and usually does a great job.
- Center-Weighted Metering:
- What it is: The camera primarily meters the light in the center of your frame but also considers the surrounding areas.
- Travel Tip: Useful when your main subject is in the center and the background might be significantly brighter or darker, like a person standing under a bright archway.
- Spot Metering:
- What it is: The camera measures light from a very small, specific area (often where your active autofocus point is).
- Travel Tip: This is incredibly powerful for tricky lighting situations! Imagine a musician performing on a dimly lit stage, with a bright spotlight on their face. Evaluative metering might overexpose their face to brighten the dark background. Spot metering on their face ensures their skin tone is perfectly exposed, even if the rest of the scene remains dark and dramatic. I used this to capture the intense gaze of a street artist in Berlin, ensuring his face was perfectly lit despite the harsh backlight.
Actionable Advice:
Consider learning "back-button focus." It decouples focus from the shutter button, allowing you to focus once and then recompose and shoot multiple times without refocusing. It’s a game-changer for speed and precision!
Chasing the Light: Settings for Golden Hour & Blue Hour Magic
Light is everything in photography, and these two periods of the day offer the most magical, flattering, and dramatic light you can imagine. Don't miss them!
1. Golden Hour: The Warm Embrace
- What it is: The hour after sunrise and the hour before sunset, when the sun is low in the sky, casting a soft, warm, golden glow.
- The Magic: This light is incredibly flattering for portraits, brings out the texture in landscapes, and creates long, dramatic shadows.
- Settings for Golden Hour:
- ISO: Keep it low (100-400) as there's still ample light.
- Aperture:
- For landscapes (like those rolling Tuscan hills at sunset): f/8 to f/16 for deep depth of field.
- For portraits (a friend silhouetted against the sunset): f/2.8 to f/4 for beautiful bokeh.
- Shutter Speed: Adjust to achieve correct exposure, usually still fast enough for handheld shots (1/60s to 1/250s), but can be slower if you're going for intentional motion blur or using a tripod.
- White Balance: 'Daylight' or 'Cloudy' can often enhance the warmth, or keep it on 'Auto' and adjust in post.
- Travel Tip: I've captured some of my most cherished photos during golden hour. That iconic shot of the Florence Duomo, bathed in a fiery orange glow? Golden hour. The sun-kissed vineyards of Bordeaux? Golden hour. Plan your shoots around these times using apps like PhotoPills or Sun Surveyor – they'll tell you exactly when golden hour starts and ends for any location in the world.
2. Blue Hour: The Deep, Moody Mystery
- What it is: The period just before sunrise and just after sunset, when the sky turns a deep, rich blue, and artificial lights begin to twinkle.
- The Magic: Creates a moody, sophisticated atmosphere. Cityscapes, architecture, and night scenes truly come alive.
- Settings for Blue Hour:
- ISO: Keep it low (100-400) to minimize noise, as light levels are dropping.
- Aperture: f/8 to f/11 is often ideal for cityscapes to ensure everything from the streetlights to distant buildings is sharp.
- Shutter Speed: This is where you'll go long! Expect exposures from 1 second to 30 seconds or more.
- White Balance: 'Daylight' or 'Cloudy' often works well to enhance the cool tones, or 'Tungsten' can make the artificial lights pop with a warmer glow.
- Crucial Gear: A tripod is absolutely essential for blue hour photography due to the long shutter speeds.
- Travel Tip: My favorite blue hour memory is capturing the Venetian canals. The deep blue sky, the warm glow from the ancient buildings, and the reflections in the water – it was breathtaking. I used an ISO of 200, an aperture of f/10, and a shutter speed of 8 seconds. The result was pure magic, a scene straight out of a painting. Similarly, capturing the vibrant neon glow of Shinjuku, Tokyo, during blue hour, with the sky still showing hints of deep blue, creates an incredible contrast.
Actionable Advice:
Don't just show up and shoot. Plan your golden and blue hour locations in advance. Scout them during the day if possible to find the best angles. This preparation will pay off immensely!
Elevate Your Shots: Advanced Techniques & Post-Processing Essentials
Once you've mastered the basics, a few more tricks can truly set your travel photos apart.
1. RAW vs. JPEG: Why RAW is King
- JPEG: Your camera processes the image, compresses it, and discards a lot of data. It's ready to share but offers limited editing flexibility.
- RAW: An unprocessed, uncompressed "digital negative" containing all the data your camera sensor captured.
- Travel Tip: Always, always shoot in RAW (or RAW+JPEG if you want quick previews). While RAW files are larger, they give you immense flexibility in post-processing to adjust exposure, white balance, shadows, and highlights without losing image quality. I once underexposed a shot of a vibrant spice market in Istanbul – a common mistake when rushing. Because I shot in RAW, I was able to recover the shadows and bring out all the rich colors in Lightroom, turning what would have been a throwaway shot into a keeper.
2. Drive Modes: Don't Miss the Moment
- Single Shot: Takes one photo per press.
- Continuous High/Low (Burst Mode): Takes multiple photos rapidly as long as you hold down the shutter.
- Travel Tip: For wildlife (like a puffin taking off in Iceland) or fast-moving street scenes (a tuk-tuk zooming by in Cambodia), continuous high is your best friend. You'll get many shots, increasing your chances of capturing that perfect, sharp moment. Just be prepared to delete a lot of near-misses!
3. Exposure Compensation (+/- Buttons): Quick Brightness Adjustments
- What it is: A quick way to tell your camera to make the image brighter (+) or darker (-) when shooting in Aperture Priority (Av/A) or Shutter Priority (Tv/S) modes.
- Travel Tip: If you're shooting a snow scene in the Alps, your camera might try to underexpose it, making the snow look grey. Dial in +1 or +2 stops of exposure compensation to make the snow bright white. Conversely, if you're shooting a dark subject against a bright background, you might dial in -1 to prevent overexposure of the subject. It's a faster way to fine-tune your exposure than constantly adjusting the exposure triangle manually.
4. Bracketing: For High-Contrast Scenes
- What it is: Your camera takes multiple shots (usually 3 or 5) of the same scene at different exposures – one correctly exposed, one underexposed, and one overexposed.
- Travel Tip: This is invaluable for high-contrast scenes, like a bright sunrise over Angkor Wat where the sky is brilliant but the temple is in deep shadow. You can later combine these bracketed shots into a single High Dynamic Range (HDR) image using software, revealing detail in both the brightest and darkest areas.
5. Post-Processing: The Final Polish
- What it is: Editing your RAW files to enhance colors, adjust contrast, sharpen details, and correct imperfections.
- Travel Tip: Don't be afraid of post-processing! It's not "cheating"; it's an essential part of the digital photography workflow. Think of it like a chef plating their dish or an artist varnishing their painting. Basic adjustments in Adobe Lightroom, Capture One, or even free mobile apps like Snapseed can transform a good photo into a stunning one. A little boost in saturation, a tweak of the shadows, and a touch of sharpening can make your travel memories truly pop on Instagram.
Conclusion: Your Journey to Unforgettable Photos Starts Now!
From the bustling souks of Marrakech to the serene fjords of Norway, your travels are a canvas waiting to be captured. My journey from blurry Santorini snapshots to the vibrant images I share on Tripsora was all about understanding these fundamental camera settings. It wasn't about buying the most expensive gear; it was about learning to wield the tools I had with confidence and creativity.
The beauty of photography is that it's a continuous learning process. Don't be intimidated. Start slow, practice in your backyard, experiment with different settings, and most importantly, have fun! Every blurry shot is a lesson learned, and every perfectly captured moment is a triumph.
So, next time you pack your bags, remember this guide. Take your camera off auto mode, embrace manual control, and watch as your travel photos transform into works of art that truly reflect the magic of your adventures. You've got this!
Now, go forth and capture your unforgettable adventures! What's one camera setting you're excited to try on your next trip? Share your thoughts and photos with us on social media using #TripsoraTravelPhotos. And don't forget to bookmark this guide – it's your new photography bible!
---