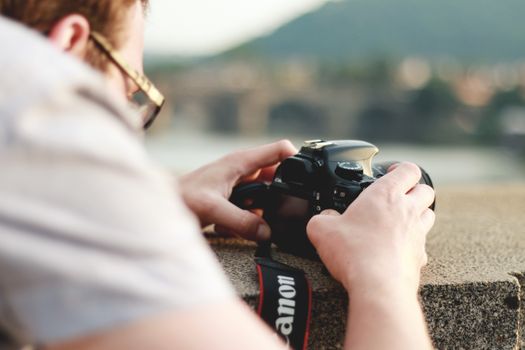
Hola, fellow adventurers and memory-makers! Your resident travel blogger, Maya, here, fresh off a whirlwind trip through the bustling souks of Marrakech and the serene rice paddies of Bali. And let me tell you, I’ve got a secret to share – one that changed my travel photography game forever, and one that locals, with their intimate knowledge of light and landscape, often guard like a hidden treasure.
I remember my first trip to Venice. I was armed with a shiny new DSLR, convinced I’d capture those iconic gondola shots everyone raves about. What did I get? Blurry gondolas, harsh midday shadows, and a distinct feeling that my photos looked… well, touristy. They were snapshots, not stories. Fast forward a few years, and I’m back in Venice, chatting with an elderly local artist sketching by a canal. He saw me fumbling with my camera, sighed, and then, with a twinkle in his eye, imparted some wisdom that wasn't about what to shoot, but how. He spoke of light, of patience, and of specific camera adjustments that transform the mundane into the magnificent. He essentially gave me a peek behind the curtain of "local photography secrets."
And that’s what this post is all about. It’s not about expensive gear; it’s about understanding your camera and the environment like a local. It’s about ditching the auto mode and embracing settings that let you tell a deeper, more authentic story. Locals don't really want tourists to know these secrets because they’re the keys to capturing the true soul of a place, not just its postcard façade. But lucky for you, I’m spilling them all. Get ready to elevate your travel photos from "meh" to "OMG, where is that?!"
---
1. The Exposure Triangle: Mastering Light Like a Local Sage
Every seasoned photographer, especially those who live and breathe their city's light, knows the exposure triangle (Aperture, Shutter Speed, ISO) isn't just a technical concept; it's the holy trinity for capturing the essence of a moment. Tourists often leave it on auto, letting the camera guess. Locals command it.
Aperture (f-stop): The Depth of Your Story
Imagine strolling through the vibrant spice markets of Fez. You want to capture that beautiful, intricately arranged mountain of saffron, with the bustling market in the background gently blurred, drawing the viewer's eye straight to your subject. This is where aperture comes in.
- Local Secret: Locals use a wide aperture (low f-number like f/1.8 to f/4) to create a shallow depth of field. This means your subject (that saffron) is razor-sharp, while the background melts into a creamy, dreamy blur (bokeh). It isolates your subject and makes it pop, giving your photos a professional, artistic feel rather than a flat, "everything-in-focus" snapshot.
- Actionable Tip: For portraits, food shots, or isolating a specific architectural detail, choose a low f-number. For sweeping landscapes where you want everything from foreground to horizon sharp, go for a narrow aperture (high f-number like f/8 to f/16). My favorite lens for this in busy street scenes is a 50mm f/1.8 – it’s affordable and creates stunning bokeh.
Shutter Speed: Freezing Time or Embracing Motion
Think of the chaotic yet captivating street performers in Barcelona's La Rambla, or the serene, flowing waterfalls of Iceland. Shutter speed dictates how your camera sees motion.
- Local Secret: Locals know when to freeze a moment and when to let it blur. For the street performer, they'd use a fast shutter speed (1/500th of a second or faster) to capture every detail of their acrobatic leap. But for those majestic waterfalls, they’d slow it right down to 1/2 to 2 seconds (or even longer with a tripod and ND filter) to create that silky, ethereal blur of water that makes the scene feel otherworldly.
- Actionable Tip: For fast-moving subjects (people, animals, vehicles), aim for 1/250s or faster. For light trails, misty water, or cloud movement, experiment with slower speeds. Always use a tripod for anything slower than 1/60th of a second to avoid camera shake.
ISO: The Sensitivity Sweet Spot
You're inside a dimly lit ancient temple in Kyoto, or perhaps enjoying a candlelit dinner on a rooftop in Rome. You need more light, but at what cost?
- Local Secret: Locals know that while a higher ISO brightens your image in low light, it also introduces "noise" or grain, which can make your photo look unprofessional. They prioritize the lowest possible ISO for the cleanest image, only bumping it up when absolutely necessary. They'd rather use a wider aperture or slower shutter speed first.
- Actionable Tip: Always start with your camera's native ISO (usually ISO 100 or 200). Increase it incrementally (ISO 400, 800, 1600) only when other settings aren't sufficient. Modern cameras handle higher ISOs better, but generally try to stay below ISO 3200 for print-quality photos.
---
2. Beyond Auto: Mastering White Balance for Authentic Hues
Have you ever taken a photo of a stunning sunset, only for it to look washed out or strangely blue? Or your vibrant street food looks a bit sickly yellow? That's often your camera's auto white balance trying (and failing) to interpret the scene. Locals, who understand the nuances of their environment's light, rarely trust auto.
- Local Secret: Locals understand that light isn't just "light"; it has a color temperature. The warm glow of the sun in Santorini is different from the cool, overcast light in London, or the artificial yellow of a night market in Bangkok. They manually adjust their white balance (WB) to accurately represent these colors, or even enhance them for artistic effect.
- Actionable Tip: Instead of "Auto WB," switch to presets like "Daylight" (for sunny outdoor scenes), "Cloudy" (for overcast days, adding warmth), "Shade" (for open shade, adding more warmth), "Tungsten" (for indoor incandescent lights, cooling the image), or "Fluorescent" (for fluorescent lights, warming the image). Even better, learn to set a custom white balance using a grey card or a white object in the scene. This ensures true-to-life colors, making your photos pop with authenticity. I once shot a vibrant fruit stall in Vietnam, and switching from Auto to "Cloudy" (even though it was sunny) brought out the incredible reds and greens in a way Auto simply couldn't touch.
---
3. The Art of Focus: Pinpointing Your Story and Creating Depth
A blurry photo is a missed opportunity. A perfectly sharp photo, with your subject in crisp detail, tells a story. Tourists often rely on the camera's multi-point auto-focus, which can guess wrong. Locals are precise with their focus.
- Local Secret: Locals don't let the camera decide what's important. They use single-point auto-focus and manually select their focus point to ensure the most crucial part of their image is tack-sharp. They also understand the power of recomposing – focusing on their subject, locking focus (often by half-pressing the shutter button), and then slightly shifting the camera to achieve a more pleasing composition without losing focus.
- Actionable Tip:
- Single-Point AF: In your camera's menu, select "Single-point AF" or "Spot AF." Use the joystick or directional pad to move this single point directly over your subject's eye (for portraits), the most important detail (for objects), or the foreground (for landscapes).
- Continuous AF (AI Servo/AF-C): For moving subjects like children playing on a beach in Phuket or surfers catching waves, switch to "Continuous AF." This mode constantly adjusts focus as your subject moves, increasing your chances of a sharp shot.
- Manual Focus: For static scenes, macro photography, or when your camera struggles in very low light, don't be afraid to switch to manual focus. The focus peaking feature on many mirrorless cameras is a game-changer for this.
---
4. Timing is Everything: Chasing the Golden and Blue Hours Like a Pro
This isn't a camera setting in the traditional sense, but it's arguably the most crucial "local secret" for breathtaking travel photos. Locals know their city's light like the back of their hand because they live with it every day. They know when the light is magic, and tourists often miss it, shooting only in harsh midday sun.
- Local Secret: The best photographers, local or otherwise, live and die by the Golden Hour and Blue Hour.
- Golden Hour: The hour after sunrise and the hour before sunset. The light is soft, warm, diffused, and casts long, flattering shadows. It's perfect for virtually any kind of photography, from landscapes (think the rolling hills of Tuscany bathed in golden light) to portraits.
- Blue Hour: The period just after sunset and just before sunrise, when the sky deepens to a rich, luminous blue, and city lights begin to twinkle. This is ideal for cityscapes, capturing that magical transition from day to night (like the Eiffel Tower sparkling against a deep blue sky).
- Actionable Tip: Plan your photography excursions around these times. Use apps like PhotoPills or The Photographer's Ephemeris to know exactly when Golden and Blue Hour occur for your specific location. Wake up early for sunrise; stay out late for sunset. Yes, it means sacrificing sleep, but the results are always worth it. I remember dragging myself out of bed at 4 AM for sunrise over Angkor Wat, and the ethereal glow, the mist, the colors – it was an unparalleled photographic experience. Midday shots almost never have that same impact.
---
5. Compositional Secrets: Framing Your World (Beyond the Settings)
While not a camera setting, composition is how you arrange elements within your frame, and it's what truly separates a snapshot from a work of art. Locals, with their innate understanding of their environment, often compose instinctively. Tourists often point and shoot.
- Local Secret: Locals don't just point; they see. They use natural frames, leading lines, and the rule of thirds to guide the viewer's eye and create visual harmony.
- Rule of Thirds: Imagine a tic-tac-toe grid over your image. Place your main subject or points of interest along these lines or at their intersections. Your camera often has a grid overlay you can activate.
- Leading Lines: Use natural lines (roads, rivers, fences, walls, shadows) to draw the viewer's eye deeper into the scene, creating depth and direction. Think of a winding path through a bamboo forest in Japan.
- Framing: Look for natural frames like archways, windows, tree branches, or even people to frame your subject. This adds context and depth. A shot of a bustling street in Kyoto, framed through a traditional wooden gate, instantly becomes more intriguing.
- Symmetry and Patterns: Many cultures build with symmetry and repeating patterns. Locals appreciate and capture this inherent beauty.
- Actionable Tip: Activate your camera's grid overlay. Before you shoot, pause and look for leading lines, natural frames, and opportunities to place your subject off-center using the rule of thirds. Experiment with different angles – get low, get high. My favorite trick in crowded places like the Spanish Steps in Rome is to get down low and shoot upwards, using the steps themselves as leading lines, minimizing the crowd and emphasizing the architecture.
---
6. The Local's Lens: Gear & Mindset Hacks (Beyond the Camera Body)
Sometimes, the "secret" isn't a button, but an accessory or, more importantly, a mindset. Locals often have a minimalist approach, choosing gear that enhances their ability to blend in and capture authentic moments, and a patience that tourists often lack.
- Local Secret: The Prime Lens Advantage. Many local street photographers swear by prime lenses (lenses with a fixed focal length, like a 35mm or 50mm). Why? Because they force you to "zoom with your feet." This means you have to move, interact with your environment, and actively seek out the best angles. Primes also typically have wider apertures (e.g., f/1.8), offering superior low-light performance and beautiful bokeh.
- Actionable Tip: If you have a kit lens (e.g., 18-55mm), consider investing in an affordable 50mm f/1.8 prime lens. It's a game-changer for portraits, street photography, and capturing intimate details. It forces you to connect more deeply with your subject and surroundings. I once spent a week in Havana with just a 35mm prime, and the close-up, personal shots I got were far more compelling than any wide-angle tourist shot.
- Local Secret: The Tripod is Your Best Friend. For those magical Golden/Blue Hour shots, or for capturing light trails, or even just for tack-sharp landscapes, locals know a tripod is non-negotiable. It allows for slower shutter speeds and precise composition without camera shake.
- Actionable Tip: Invest in a lightweight, travel-friendly tripod. It will open up a whole new world of photographic possibilities, especially for night photography or long exposures of waterfalls or cityscapes.
- Local Secret: It's All About the Mindset. The biggest "secret" locals possess is not technical; it's their intimate connection to the place and their unhurried approach. They observe, they wait, they anticipate. They're not just rushing from one landmark to the next.
- Actionable Tip: Slow down. Put your camera down for a moment and just observe. What's happening around you? What's the light doing? What story is unfolding? Engage with people (respectfully, of course). Ask for permission before taking portraits. Sometimes the best shot comes from waiting an extra five minutes for the perfect moment or for a person to walk into the frame.
---
Conclusion: Your Journey to Local-Level Photography Starts Now!
So there you have it, folks – the "secrets" locals use to capture those impossibly perfect travel photos. It's not about magic; it's about understanding your camera beyond auto mode, mastering light, refining your focus, and composing with intent. It's about seeing the world not just as a tourist, but with the discerning eye of someone who truly knows the place.
These tips aren't just technical adjustments; they're a mindset shift. They encourage you to slow down, observe, and connect with your destination on a deeper level. And when you do, your photos will stop being mere snapshots and start becoming powerful, authentic stories that truly capture the soul of your travels.
So, grab your camera, ditch the auto mode, and go practice! Experiment with these settings on your next adventure, whether it's across the globe or just in your local park. I promise, your travel feed (and your memories!) will thank you.
Now it's your turn! Which of these "local secrets" are you most excited to try? Share your thoughts and your newly captured masterpieces with us on social media using #TripsoraTravelPhotos and #LocalLens! Let's inspire each other to see the world differently.