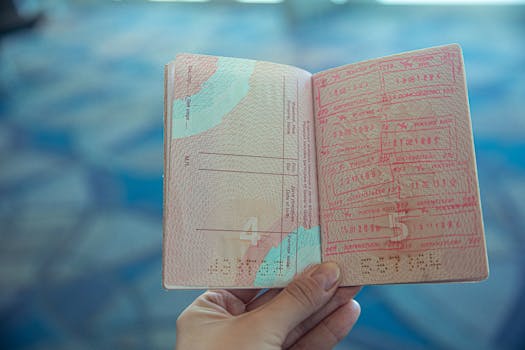
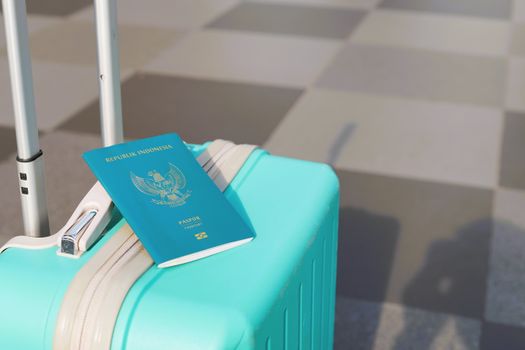
The memory is as vivid as the passport stamp in my old, tattered passport. It was a sweltering August afternoon at Paris Charles de Gaulle (CDG), and I was fresh off an overnight flight from New York. The air was thick with the scent of stale airplane coffee and unspoken exhaustion. As I rounded the corner towards immigration, my heart sank. A serpentine queue, stretching seemingly to the next terminal, greeted me. Hundreds, maybe thousands, of weary travelers snaked through the barriers, their faces mirroring my own growing despair. Two hours later, aching feet and a missed train connection later, I finally cleared customs. That day, I vowed: never again.
That soul-crushing experience at CDG wasn't an isolated incident. I'd faced similar border battles in Bangkok, Los Angeles, and even my home country. Each time, I felt a piece of my precious travel time – and sanity – being chipped away. But over the years, through trial, error, countless conversations with fellow globe-trotters, and a deep dive into official regulations, I've amassed a repertoire of "customs tricks" that have genuinely changed my life. These aren't obscure loopholes; they're smart, legal strategies that leverage technology, preparation, and a little insider knowledge to transform border crossings from a dreaded ordeal into a seamless, often surprisingly swift, part of the journey.
Today, I often find myself waving goodbye to the long lines as I glide through dedicated lanes or e-gates, sometimes clearing immigration in mere minutes while others are still unpacking their passports. It's not magic; it's strategy. And I'm here to share every single secret with you. Get ready to reclaim your travel time, reduce your stress, and truly savor every moment of your adventures.
The VIP Pass: Mastering Trusted Traveler Programs & Pre-Registration
This is, hands down, the biggest game-changer. If you take away only one tip from this entire post, let it be this: invest in a trusted traveler program. These programs, offered by various governments, pre-vet you, deeming you a low-risk traveler. In return, you get expedited processing at borders and often security checkpoints.
My Personal Experience:
My first encounter with the magic of Global Entry was at JFK. I'd just returned from a whirlwind trip through Southeast Asia, utterly exhausted. The regular immigration line was a monster. I walked up to the Global Entry kiosks, scanned my passport and fingerprints, answered a few quick questions on the screen, and within 90 seconds, I had my receipt. I then bypassed the entire queue and handed my receipt to the agent, who gave me a nod and a "welcome home." I was out the door before my luggage even hit the carousel. The feeling was pure triumph.
Key Programs & How They Work:
- Global Entry (USA): This is my holy grail for entering the United States. For a non-refundable fee of $100 (USD) for five years, you get expedited clearance at US airports. It also includes TSA PreCheck, meaning faster security lines for domestic flights. The application involves an online form, a background check, and an in-person interview. Don't be deterred by the interview; it's usually quick and straightforward. I got mine done at a local airport office, and it took about 15 minutes.
- NEXUS (USA/Canada): If you frequently travel between the US and Canada, NEXUS is a must-have. For just $50 (USD) for five years, it provides expedited processing at land, air, and marine crossings for both countries. It also includes Global Entry benefits for entry into the US and TSA PreCheck. The application process is similar to Global Entry but requires an interview with both US and Canadian border officials.
- E-Gates / Automated Border Control (ABC) Systems: Many countries, particularly in Europe, the UK, Australia, New Zealand, and Singapore, have automated e-gates for passport holders of specific nations. For example, EU, EEA, Swiss, UK, US, Canadian, Australian, New Zealand, Japanese, and Singaporean citizens can often use e-gates in the UK.
- Tip: Always check if your passport is eligible for e-gates at your destination. This information is usually readily available on the airport's or government's immigration website. There's no pre-registration fee for these – just walk up, scan your passport, look at the camera, and you're through! I've breezed through London Heathrow and Amsterdam Schiphol in under a minute thanks to these.
- Electronic Travel Authorizations (ETAs/EVWs): Before you even leave home, ensure you've completed any necessary pre-registration.
- ESTA (USA): Required for visa-waiver program countries entering the US. Cost: $21 (USD).
- eTA (Canada): Required for visa-waiver program countries entering Canada by air. Cost: $7 (CAD).
- K-ETA (South Korea): Required for visa-free entry to South Korea. Cost: 10,000 KRW (approx. $8 USD).
- Schengen ETIAS (EU - coming soon): This will be similar to ESTA, required for visa-exempt non-EU nationals entering the Schengen Area. Keep an eye out for its implementation.
- Actionable Advice: Apply for these well in advance, not the day before your flight. While often processed quickly, delays can happen. Print a copy or save a digital one to your phone for easy access.
The Digital Nomad's Toolkit: Master Your Documents & Apps
In an increasingly digital world, your passport isn't the only document that matters. Being digitally prepared can shave minutes off your border crossing.
My Personal Experience:
Landing in Brazil once, I saw a mountain of paper health declaration forms being handed out on the plane. Knowing Brazil had a digital option, I pulled out my phone, quickly filled out the required information on their official app, and generated a QR code. At the immigration desk, while others fumbled with pens and paper, I simply showed my QR code on my phone. The agent scanned it, and I was on my way. Simple. Efficient.
Practical Tips:
- Digital Copies are Your Friend: Scan your passport, visas, flight itineraries, hotel bookings, and travel insurance. Save them to a cloud service (Google Drive, Dropbox), email them to yourself, and keep them on your phone. If your physical documents are lost or stolen, digital copies are invaluable.
- The Power of the PDF: Create a single PDF document with all essential travel info (passport scan, visa, flight, hotel, insurance). Name it clearly (e.g., "ParisTrip_Documents.pdf"). This is incredibly handy for quick reference.
- Government Travel Apps: Many countries now have official apps for customs declarations or health forms.
- ArriveCAN (Canada): Expedites entry by allowing you to submit customs and immigration information in advance.
- Mobile Passport Control (MPC - USA): Allows US citizens and Canadian visitors to submit their passport and customs declaration information via their smartphone or tablet prior to arrival. This can also save significant time.
- Check Before You Fly: Always check the official government or airport website of your destination for any mandatory digital forms or recommended apps.
- Organized Physical Documents: Despite the digital age, a physical passport is still king. Keep it in an easily accessible but secure place. A travel wallet or a dedicated passport holder that keeps your passport, boarding pass, and any physical visas together is a lifesaver. Avoid rummaging through your bag at the immigration desk.
Strategic Timing & Airport Intelligence: The Art of Evasion
Sometimes, the trick isn't what you do, but when and where you do it. Long queues are often a product of peak hours and popular routes.
My Personal Experience:
I once had a choice between two flights to Lisbon – one arriving at 1 PM, the other at 5 PM. I chose the earlier one, knowing that most transatlantic flights from the US tend to land in Europe in the mid-to-late afternoon. My flight landed, and while there was a queue, it was manageable. Later that day, I saw social media posts from friends on the later flight, stuck in an immigration line that snaked through the entire hall. A few hours' difference made all the difference.
Actionable Advice:
- Off-Peak Arrivals: If your schedule allows, try to book flights that arrive during off-peak hours. Early mornings (before 8 AM) or late evenings (after 9 PM) often see fewer arrivals than the midday rush. Use flight tracking apps (like FlightAware or FlightStats) to see typical arrival patterns at your destination airport.
- Mid-Week Travel: Tuesdays, Wednesdays, and Thursdays are generally less busy for travel than Fridays, Saturdays, and Sundays. This applies to border crossings too.
- Smaller Airports/Terminals: If your destination has multiple airports (e.g., London has Heathrow, Gatwick, Stansted, Luton), research which one tends to have shorter customs lines. Sometimes, flying into a slightly smaller airport can save you hours, even if it means a longer transfer to your final destination. Similarly, some larger airports have multiple terminals with varying levels of busyness.
- Connect Smart: If you have a connecting flight, always factor in ample time for immigration and customs, especially if it's your first port of entry into a new country or region (like the Schengen Area). Don't schedule a tight 60-minute connection if you need to clear customs first.
Packing with Purpose: Declare Smart, Not Sorry
What you carry in your luggage and how you declare it can also significantly impact your border experience. Customs officials are primarily looking for prohibited items, undeclared goods, and anything that might pose a risk.
My Personal Experience:
I once brought back some exquisite, locally-made honey from New Zealand. I knew agricultural products could be tricky, so I made sure it was clearly labeled, in its original sealed packaging, and I declared it truthfully on my customs form. While others were being pulled aside for secondary inspections due to undeclared fruit or snacks, I simply pointed to my declared honey, got a quick nod from the officer, and walked through. Honesty, in this case, was the fastest policy.
Practical Tips:
- Know Before You Go: Research the customs regulations of your destination country before you pack. What food items are prohibited? What are the limits on alcohol, tobacco, or cash? Ignorance is not an excuse at the border.
- Declare Truthfully: When in doubt, declare it. It's almost always better to declare an item and have it cleared or confiscated than to be caught with an undeclared item. Penalties for false declarations can range from fines to detainment, and it will certainly cost you hours.
- Separate Declarable Items: If you are bringing items that need to be declared (e.g., expensive purchases, specific food items), pack them in an easily accessible part of your luggage. This allows for quick inspection if needed, without having to unpack your entire suitcase.
- Avoid Prohibited Items: This seems obvious, but people still try to bring in fresh fruit, plants, or certain meats. These are almost universally prohibited in many countries due to biosecurity risks. Finish your apple on the plane!
- Receipts for High-Value Items: If you're traveling with expensive electronics (laptops, cameras) that you bought at home, carry their original receipts or proof of purchase. This helps prove you didn't buy them abroad, avoiding potential import duties.
The E-Gate Revolution: Your New Best Friend
E-gates, also known as automated border control systems, are the unsung heroes of modern travel. These machines use facial recognition and passport scanning to verify your identity, often allowing you to bypass human agents entirely.
My Personal Experience:
There was a time when landing at London Heathrow meant mentally preparing for a 45-minute to hour-long wait at immigration. Then, the UK rolled out its e-gates for eligible nationalities. The first time I used one, I felt like I'd discovered a cheat code. I walked past hundreds of people in the "all passports" line, scanned my US passport, waited a few seconds for the gate to open, and I was through. The entire process took less than a minute. It was truly transformative for my European travel.
Tips for Using E-Gates:
- Check Eligibility: As mentioned, e-gates are usually restricted to citizens of specific countries. Always verify your eligibility.
- Prepare Your Passport: Have your passport open to the photo page, ready to scan.
- Remove Accessories: Take off hats, sunglasses, or anything else that might obscure your face for the camera.
- Face the Camera Clearly: Stand still, look directly at the camera, and follow any on-screen instructions. Don't rush.
- Fingerprint Scans: Some e-gates also require a fingerprint scan. Ensure your fingers are clean and dry.
- Don't Panic: If an e-gate doesn't open, remain calm. It might be a technical glitch, or it might flag you for a quick check by a human agent. It's not necessarily a problem. Just proceed to the designated assistance point.
- Instagram-worthy moment: Snapping a quick, discreet photo of the empty e-gate line as you walk through (if allowed and without holding up others) is a great way to showcase your border-breezing prowess!
The Human Element: Presentation, Politeness, and Poise
While technology and preparation are key, never underestimate the power of human interaction. Border agents are people doing a tough job, and how you present yourself can influence your experience.
My Personal Experience:
I once witnessed a traveler, clearly agitated from a long flight, being incredibly rude and condescending to a border agent. The agent, while professional, took their time, asked more questions, and ultimately sent the traveler to secondary inspection. Moments later, I approached the same agent, offered a polite "hello" and "thank you," answered their questions concisely, and was waved through with a smile. It was a stark reminder that a little respect goes a long way.
Actionable Advice:
- Dress Appropriately: While you don't need to wear a suit, avoid looking disheveled, overly casual, or like you've just rolled out of bed. A neat appearance conveys respect and seriousness.
- Be Polite and Respectful: A simple "hello," "thank you," and "goodbye" can make a difference. Maintain eye contact.
- Be Concise and Honest: Answer questions truthfully and directly. Don't offer unnecessary information or elaborate stories unless asked. "Purpose of visit?" "Tourism." "How long?" "Two weeks."
- Have Your Story Straight: Know your itinerary, your accommodation details, and your departure plans. If asked, you should be able to articulate your purpose of visit and how long you intend to stay without hesitation.
- No Jokes: Border control is serious business. Avoid humor or sarcasm, as it can easily be misinterpreted.
- Stay Calm: If you're stressed, take a deep breath. Appearing nervous or evasive can raise suspicion.
- Present Documents Clearly: Hand over your passport and any other requested documents without fumbling.
Conclusion: Reclaim Your Travel Time, Embrace the Journey
The days of dreading border crossings are over for me, and they can be for you too. These customs tricks aren't about circumventing rules; they're about understanding the system, leveraging available tools, and approaching your journey with a proactive, informed mindset. From the initial investment in a trusted traveler program to the simple act of preparing your documents and choosing your arrival time wisely, each tip builds upon the last, creating a seamless travel experience that saves you hours – hours you can now spend exploring a new city, relaxing on a beach, or simply enjoying your well-deserved vacation.
Imagine the satisfaction of walking past a hundreds-strong queue, passport in hand, knowing you’ve outsmarted the system (legally, of course!). That feeling of freedom, of reclaiming your precious travel time, is truly priceless. So, go forth, arm yourself with these strategies, and transform your next border crossing into a breeze. Your future self, sipping a cocktail instead of standing in line, will thank you.
What are your go-to border hacks? Share your own customs tricks in the comments below! Let's help each other travel smarter, not harder.
---